Chcesz blokować niechciane oprogramowanie lub wyeliminować jege problem na stałe, ale nie możessz znaleść skutecnej metody? Ten artykuł pomoże Ci zrozumieć jak uniknąć programów adware, zawiera również informacje jak usunąć Sale Clipper.

Sale Clipper to program typu adware, infekuje Twój computer, pokzując niechciane pop-up’y, może nawet ingerować w wyniki wyszukiwania na stronach wyszukiwarki Google. Jest wykrywany jako adware przez programy anti-maleware.
Infekcja objawia się przede wszystkim jako niechciane wyniki wyszukiwania, pop-up’y lub otwieranie dodatkowych kart w wyszukiwarkach. Może również zbierać informacje z Twojej przeglądarki, przekazując je do firm trzecich (spam, marketing itp.) Dodatkowy działaniem może być wzbudzanie Twojego komputera, jak również otwiera możliwość infekcjom poprzez inne programy.
Jeżeli Twój komputer został zarażony Sale Clipper poniższe informacje pomogą ci usunąć go. Możesz spróbować usunać go manualnie lub z pomocą Plumbytes Anti-Malware.
Software to get rid of Sale Clipper Ads automatically.

Important milestones to delete Sale Clipper Ads automatically are as follows:
- Downloading and installing the program.
- Scanning of your PC with it.
- Removal of all infections detected by it (with full registered version).
- Resetting your browser with Plumbytes Anti-Malware.
- Restarting your computer.
Detailed instructions to remove Sale Clipper Ads automatically.
- Download Plumbytes Anti-Malware through the download button above.
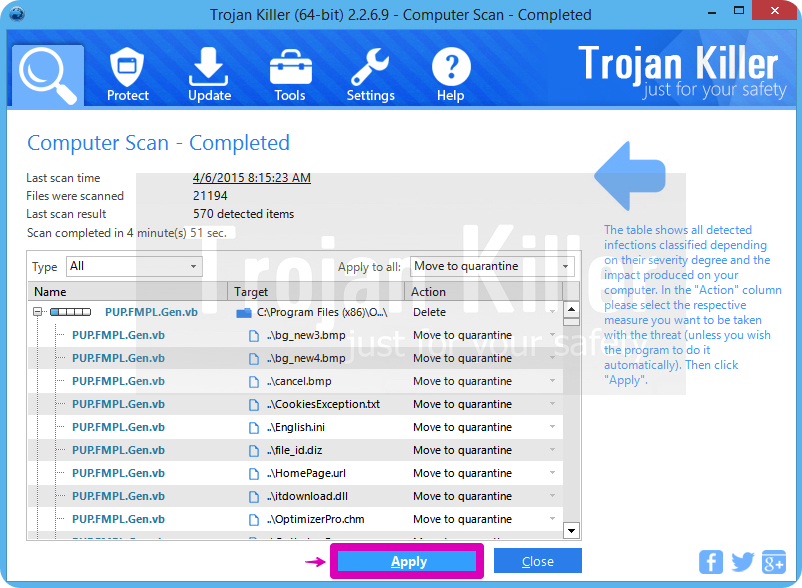
- Install the program and scan your computer with it.
- At the end of scan click “Apply” to remove all infections associated with Sale Clipper adware:
- Important! It is also necessary that you reset your browsers with Plumbytes Anti-Malware after this particular adware removal. Shut down all your available browsers now.
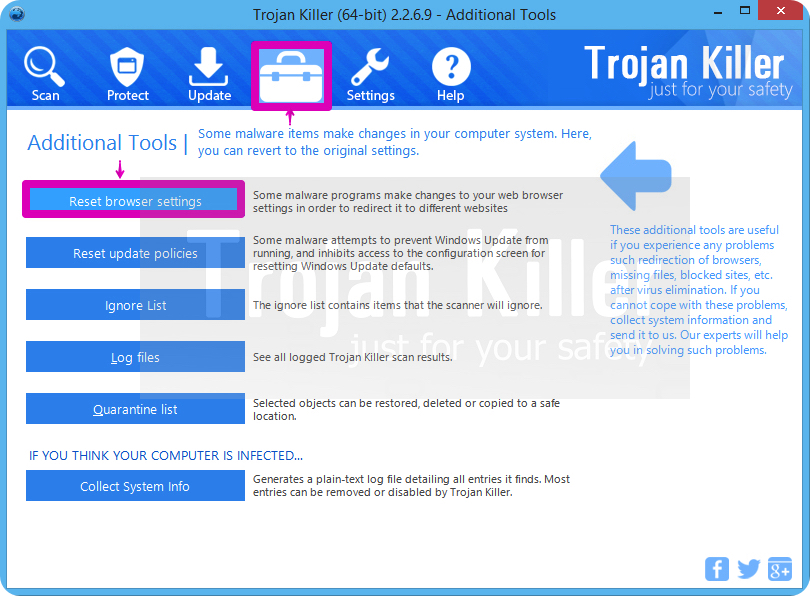
- In Plumbytes Anti-Malware click on “Tools” tab and select “Reset browser settings“:
- Select which particular browsers you want to be reset and choose the reset options.
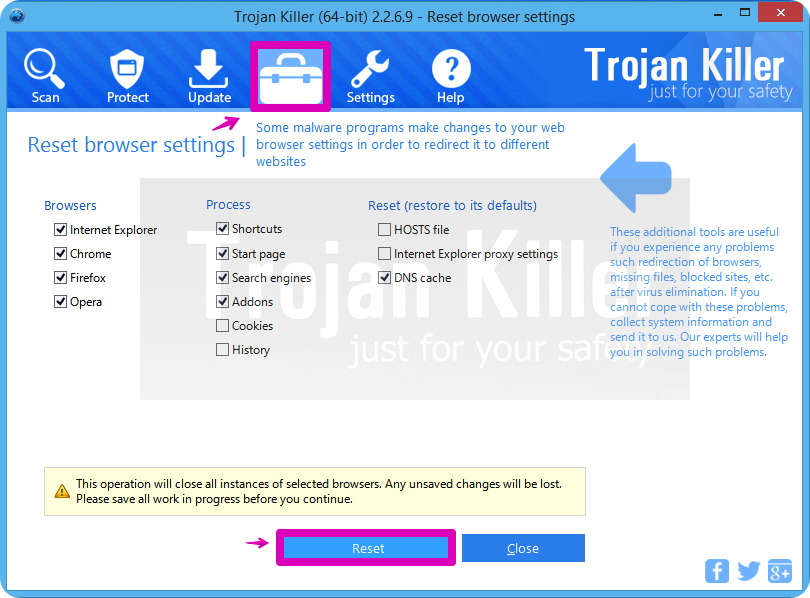
- Click on “Reset” button.
- You will receive the confirmation windows about browser settings reset successfully.
- Reboot your PC now.
Video guide explaining how to reset browsers altogether automatically with Plumbytes Anti-Malware:
Detailed removal instructions to uninstall Sale Clipper manually
Step 1. Uninstalling this adware from the Control Panel of your computer.
- Make sure that all your browsers infected with Sale Clipper adware are shut down (closed).
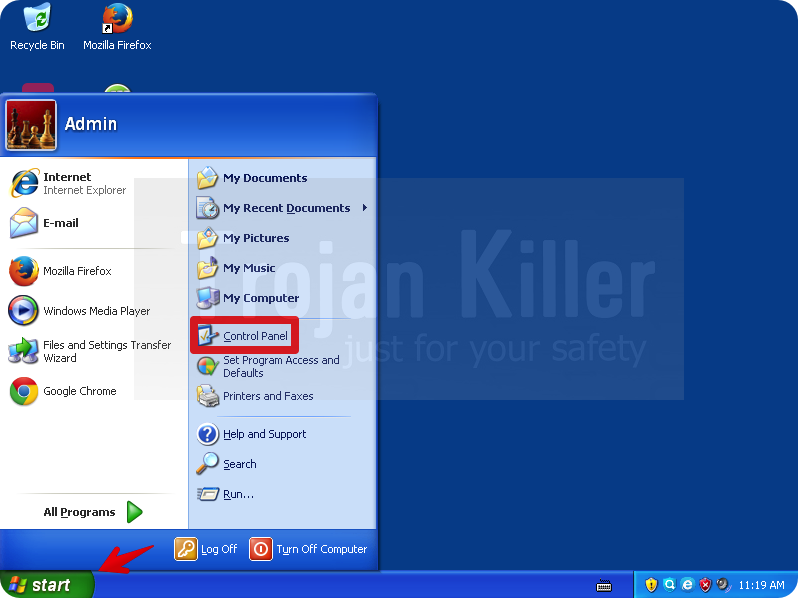
- Click on “Start” and go to the “Control Panel“:
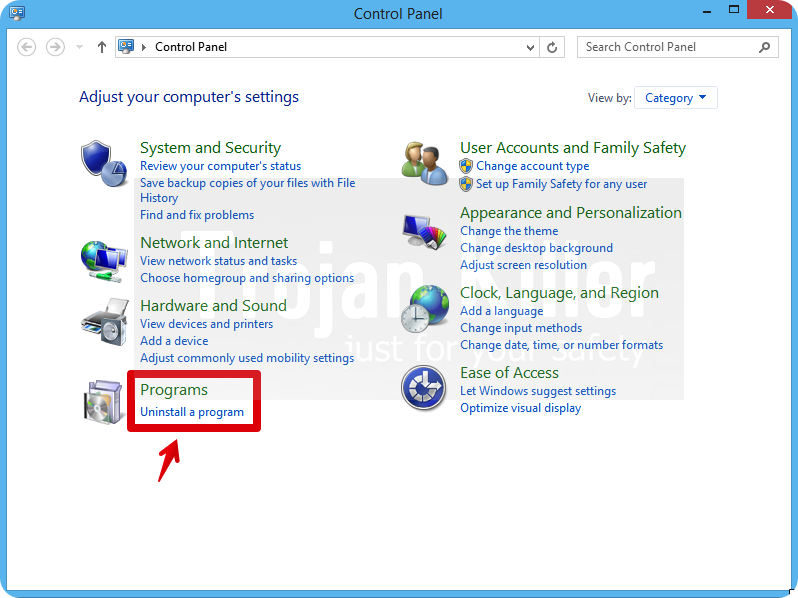
- To access the Control Panel in Windows 8 operating system move the computer mouse towards the left bottom hot corner of Windows 8 screen and right-click on it. In Windows 8.1, simply right-click on the “Start” button. Then click on “Control Panel“:
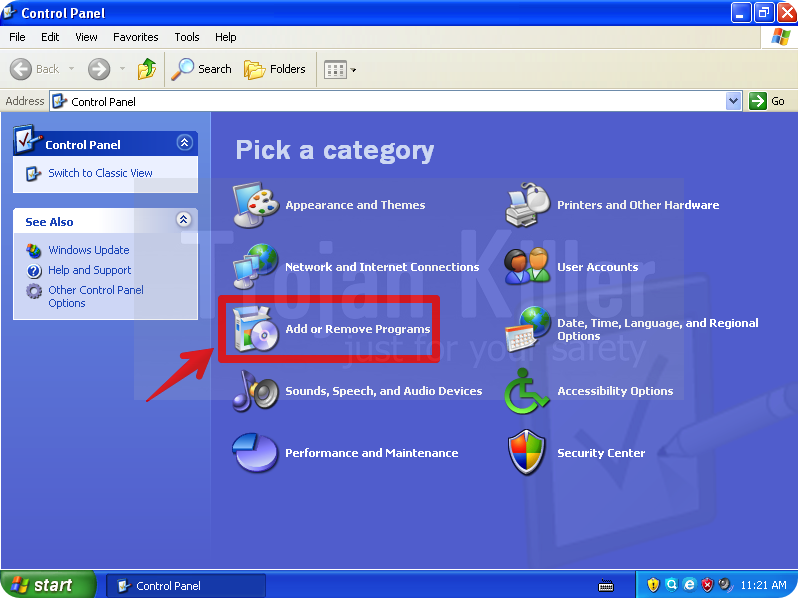
- In Windows XP click on “Add or remove programs“:
- In Windows Vista, 7, 8 and 8.1 click on “Uninstall a program“:
- Uninstall Sale Clipper adware. To do it, in Windows XP click “Remove” button related to it. In Windows Vista, 7, 8 and 8.1 right-click on this adware with the PC mouse and click on “Uninstall / Change“.

Step 2. Removing adware from the list of add-ons and extensions of your browser.
In addition to removal of adware from the Control Panel of your PC as explained above, you also need to remove this adware from the add-ons or extensions of your browser. Please follow this guide for managing browser add-ons and extensions for more detailed information. Remove any items related to this adware and other unwanted applications installed on your PC.
How to prevent your PC from being reinfected:
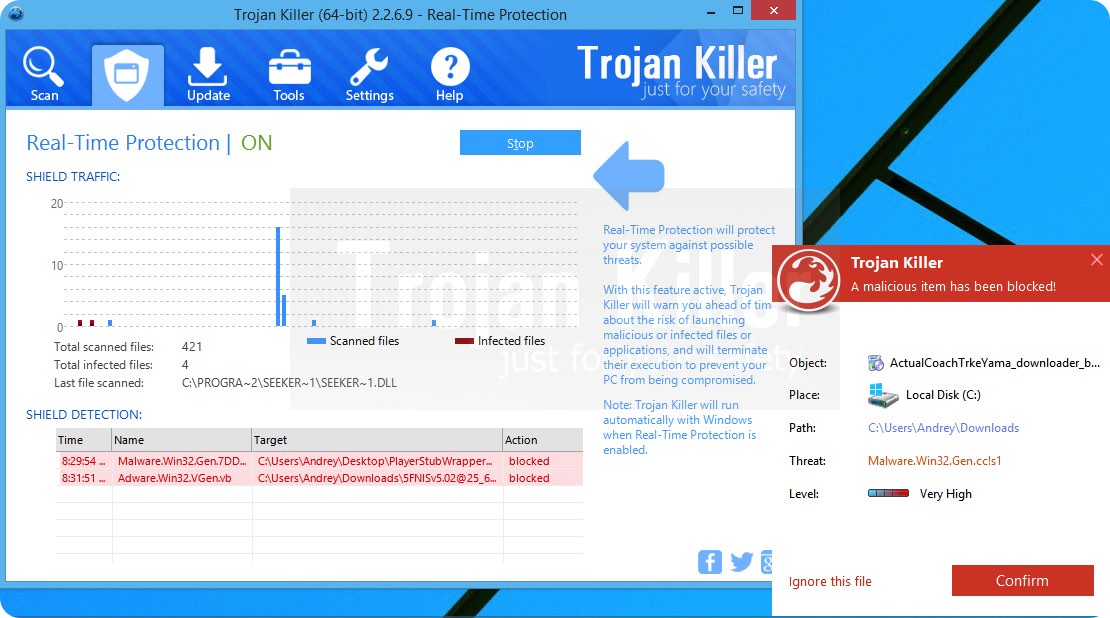
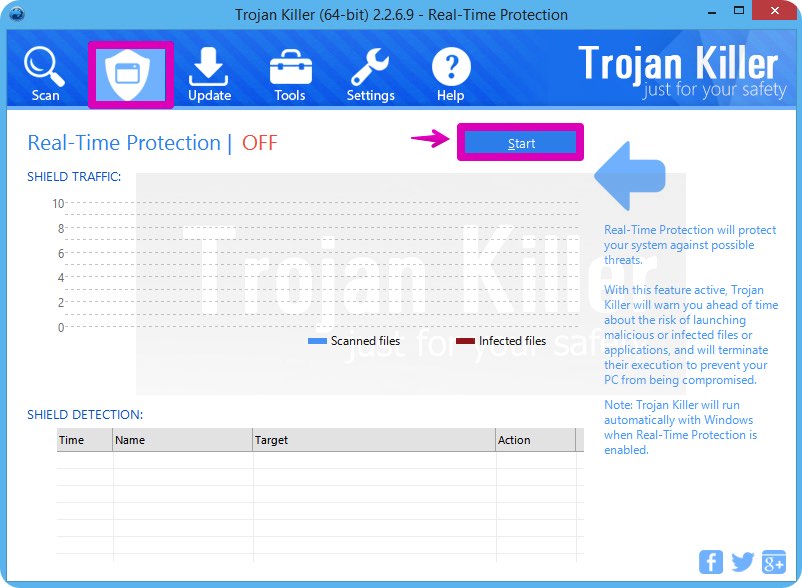
Plumbytes Anti-Malware offers a superb service to prevent malicious programs from being launched in your PC ahead of time. By default, this option is disabled once you install Anti-Malware. To enable the Real-Time Protection mode click on the “Protect” button and hit “Start” as explained below:
Once this option is enabled, your computer will be protected against all possible malware attacking your PC and attempting to execute (install) itself. You may click on the “Confirm” button to continue blocking this infected file from being executed, or you may ignore this warning and launch this file.