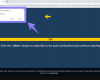
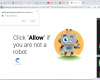
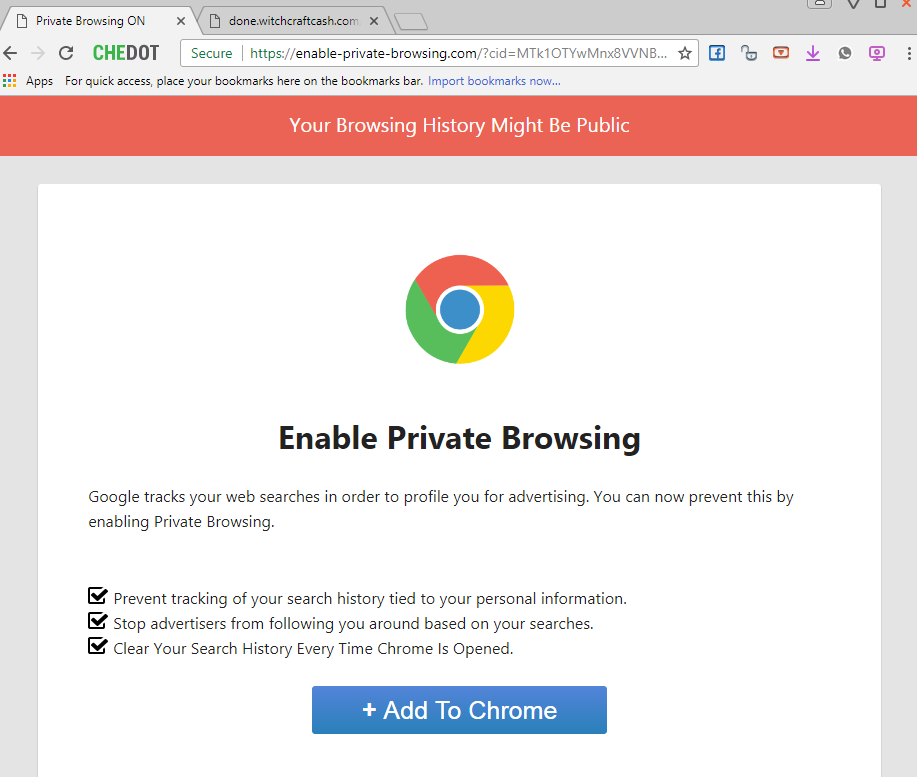
Enable-private-browsing.com (Private Browsing ON) pop-up windows you may encounter suddenly in your Google Chrome browser prove that your computer has been seriously infected with some nasty adware. It is quite likely that this adware was forcefully installed into your computer after you have been dealing with some other cost-free programs. The intention of enable-private-browsing.com pop-ups is to hijack your browser. This can be achieved by forcing you to download and install some suspicious extension into it. You definitely should be very careful not to interact with enable-private-browsing.com pop-ups because this may damage the integrity of your system. Please carefully follow this step-by-step guide to get your system duly fixed.
Quick menu to help you navigate through Private Browsing ON removal guide.
Removal guide for Private Browsing ON hijacker.
Additional manual fixes for your browsers after malware attack.
Enable-private-browsing.com does not represent any value for you in terms of finding any relevant search results. Instead, it loads your screen with the multitude of advertisement banners, pop-ups and sponsored links, which are often not really safe. Your browser could be easily redirected to many non-secure sites, which may infect your computer with other potentially unwanted or even dangerous utilities. So, definitely, it is mandatory for you to be extremely careful not to deal with this hijacker, no matter how outwardly attractive it looks like.
Enable-private-browsing.com could be installed into your PC as a result of you downloading and installing some cost-free programs recently, which were bundled by default with many potentially unwanted utilities. It is important that you pay close attention to all the information contained in the EULAs (End User License Agreements) related to free programs you intend to make the part of your computer. In case you find the information about some additional programs you don’t want, make sure to immediately switch to the advanced (custom) installation mode to avoid all sorts of malicious programs from penetrating into your computer. The fact that the hijacker got installed into your browser most likely means that you failed to be careful while installing such free applications and allowed additional programs to be implanted.
Finally, intrusion of Private Browsing ON into the system is also explained by poor protection of your computer on the part of your available anti-virus software. It is possible that its database was poorly updated and thus permitted the hijacker to be installed without any obvious restrictions. So, are you satisfied with your current anti-virus after it allowed malware to modify your browser and failed to perform its direct function? If not, you’re strongly advised to switch to a much better application suggested below that will help you to delete Private Browsing ON hijacker and other computer infections from your system. Finally, it will help you to restore your browser and clean it from remaining side effects related to the hijacker.
Enable-private-browsing.com removal instructions.
This slider below shows how to use GridinSoft Anti-Malware for Private Browsing ON detection and removal:
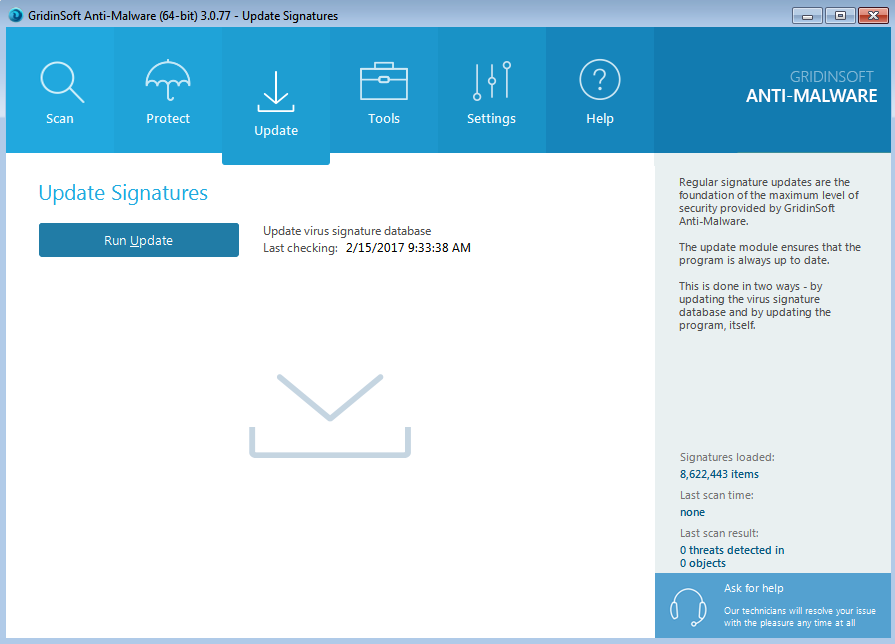
STEP 1. Install anti-malware software and update it.
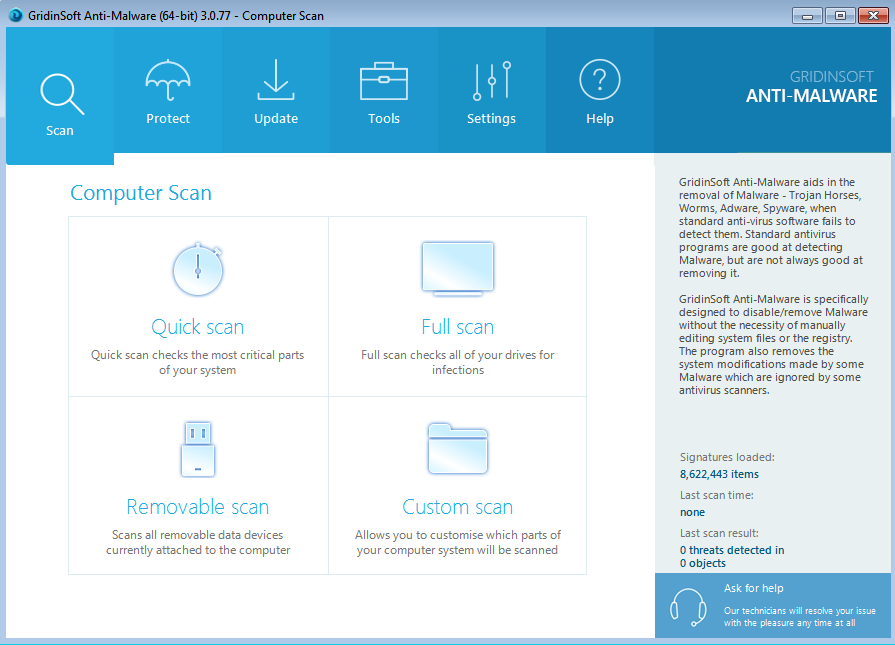
STEP 2. Select computer scan type.
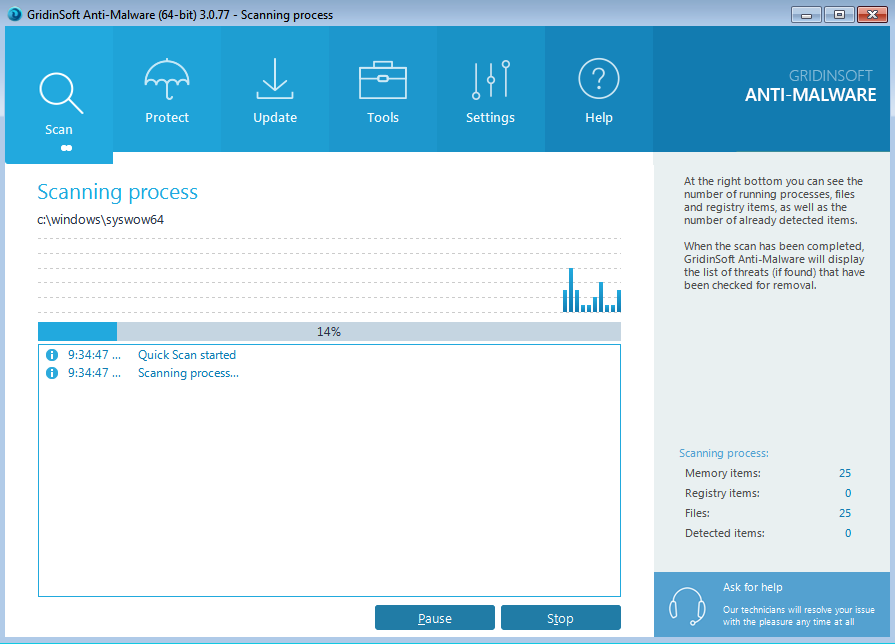
STEP 3. The software will begin scanning your computer.
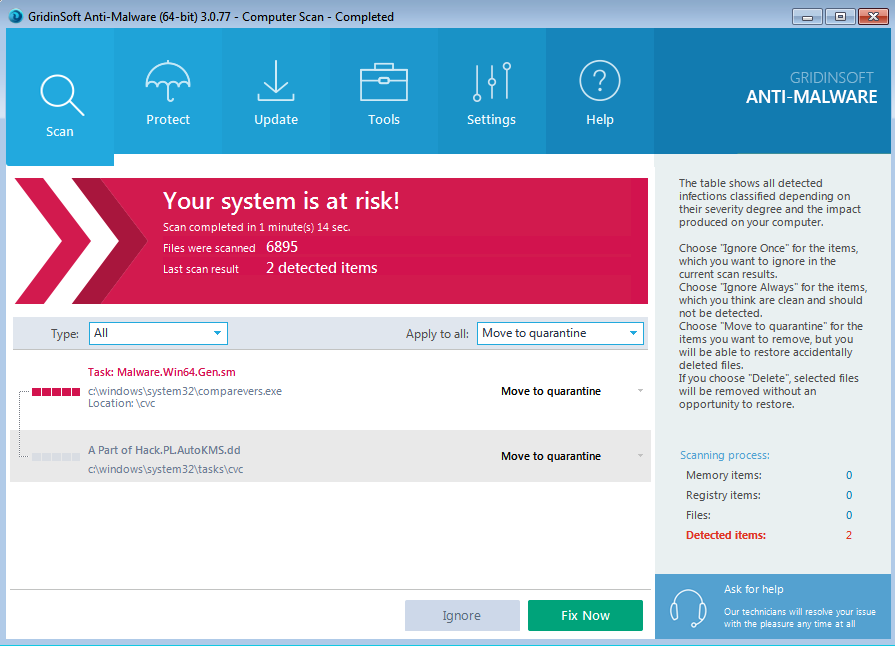
STEP 4. Once all infections are detected, click on “Fix Now”.
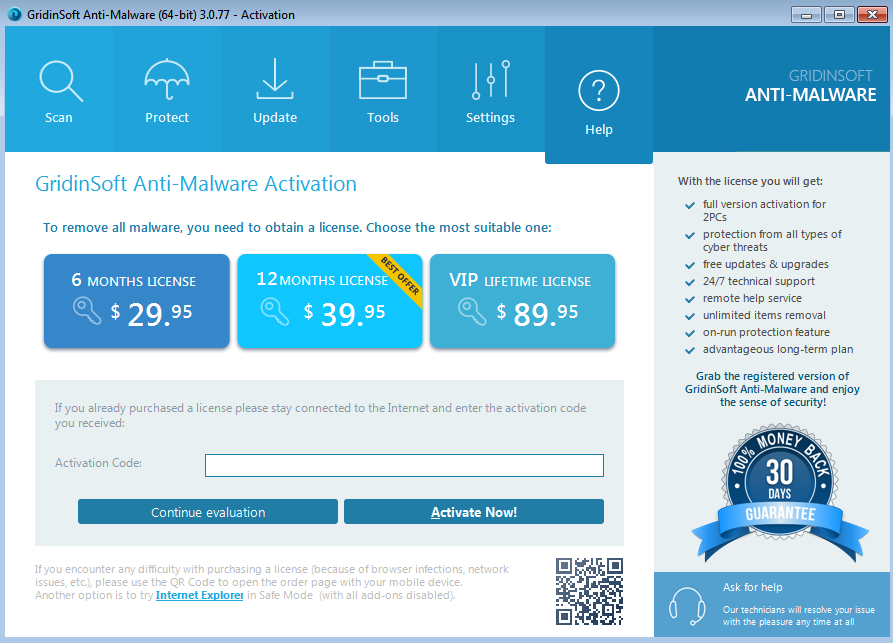
STEP 5. Select license duration for the software.
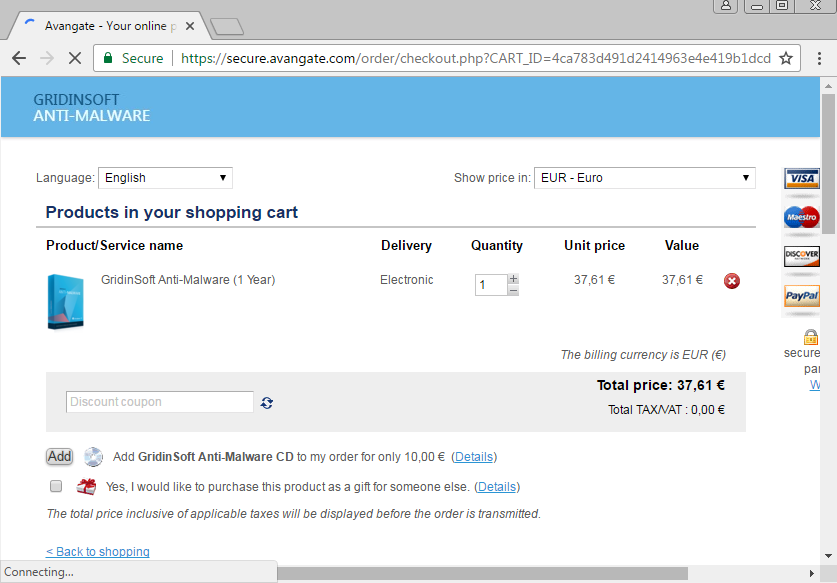
STEP 6. Purchase the program, activate it and delete the infections.

STEP 7. Click on the “Tools” button and select “Reset Browser Settings” option.
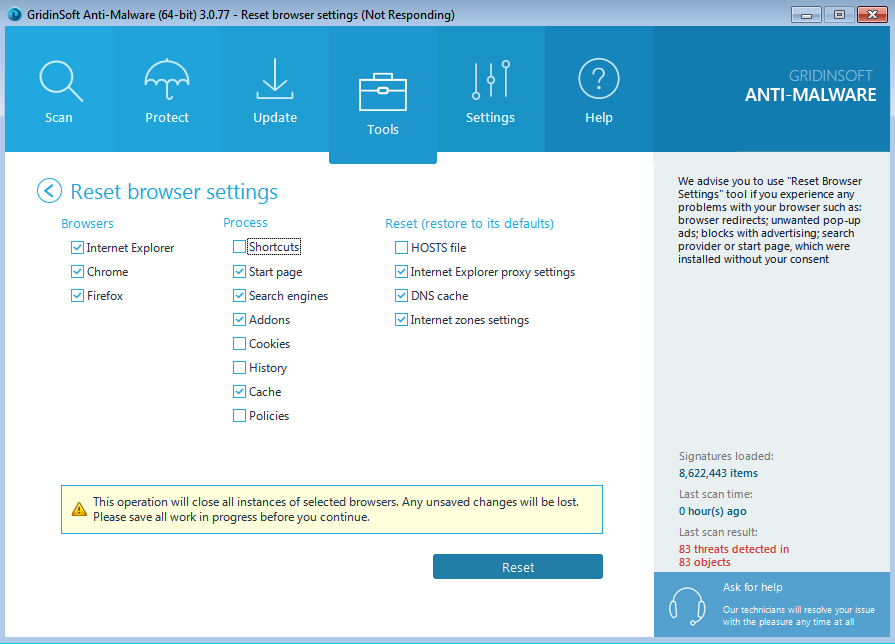
STEP 8. Click on the “Reset” button to reset your browsers.
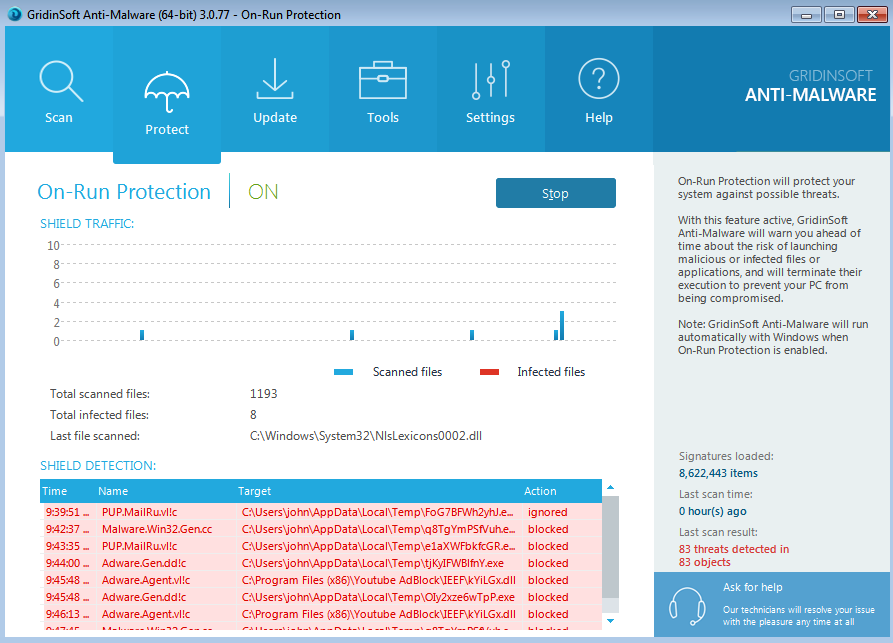
STEP 9. Click on the “Protect” button to make sure permanent anti-malware protection is enabled.
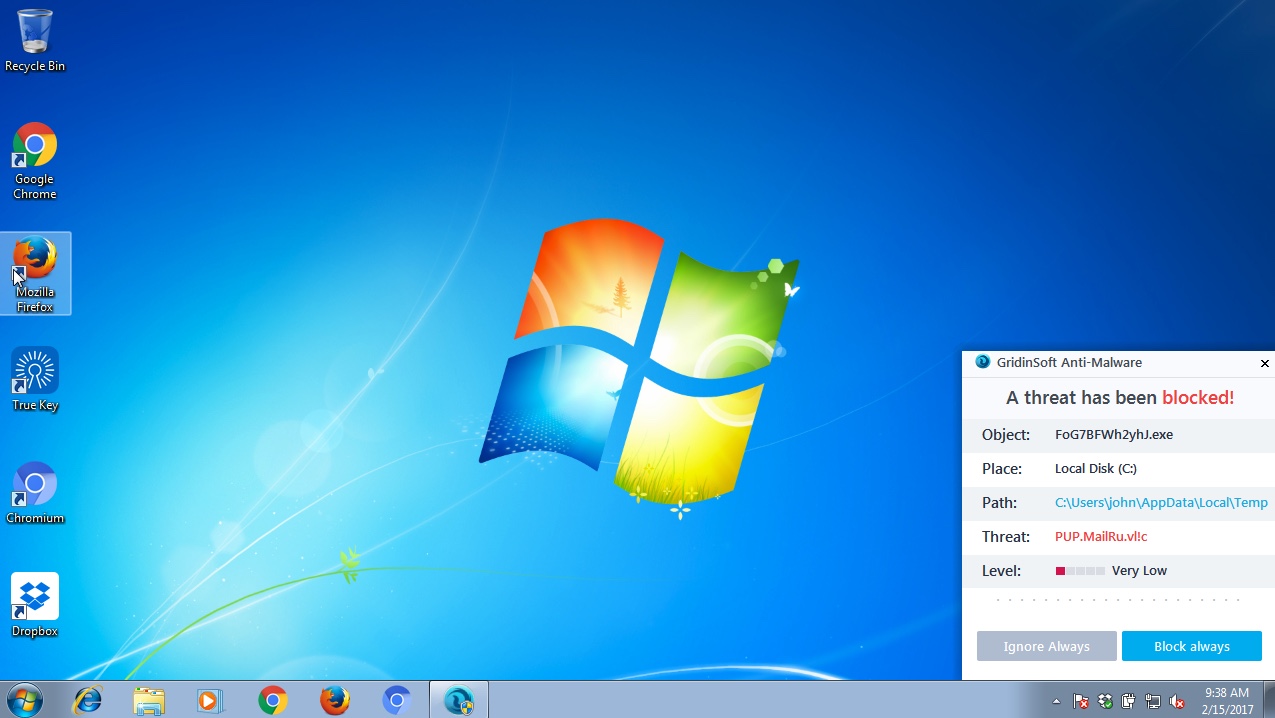
The program will protect your system from further malware intrusion attacks with its full version.
Step-by-step guidelines.
- Download GridinSoft Anti-Malware via the download button below:
- Install the application and start it. The program will automatically begin scanning your computer.
- Once the scanning is completed, click on “Fix Now“.
- Purchase the full version of the software.
- Check your email to retrieve your license key.
- Enter the license key in the respective section, then activate the software.
- With registered version of the program, get rid of all malware from your PC.
- Repeat scanning if necessary.
Solution to protect your computer from getting contaminated with Private Browsing ON and similar threats in the future:
With millions of malicious applications currently in the web people definitely need powerful security solutions for their PCs. You could have avoided all negative side effects related to unwanted intrusion of adware with the help of GridinSoft Anti-Malware, so we strongly advise that you buy GridinSoft Anti-Malware now!
After you eliminate Private Browsing ON hijacker it is mandatory to apply additional manual fixes to clean your browsers from malware traces.
[TABS_R id=7864]
![Hhyu ransomware [.hhyu file virus]](https://www.system-tips.net/wp-content/uploads/2022/07/hhu-100x80.png)