Do you think that “Ads by Provider” are brought to you by your ISP (Internet Service Provider)? Our answer is “No!” It doesn’t matter what company renders Internet services to you when it comes to the problem of adware. Such junk programs may come into your system irrespective of your location in the world, as long as Internet is available there. Such intrusive “Ads by Provider” are brought by a special adware program, which somehow made itself the part of your computer.
Ads by Provider appear in various parts of your screen. They may be represented in the form of large rectangular banners of different sizes. Plus, you may as well see certain words of the site you visit to be highlighted with a special color. When you move the computer mouse next to such words, Ads by Provider pop up. Finally, your browser may experience the trouble of persistent redirection to random websites which might easily spread another adware into your computer.
Removal menu for “Ads by Provider” adware:
- Recommended software to remove adware automatically.
- Resetting browser settings after automatic removal of adware.
- Video explaining how to reset your browsers affected by adware.
- Tutorial to remove adware manually.
- How to prevent your PC from being reinfected.

The problem related to adware, and to Ads by Provider in particular, isn’t something new. There are many other users today who actually face the same troubles. These days various adware samples are actively spread in the Internet along with other free applications. Let’s say, you’ve recently found some nice free application and have made the decision to make it the part of your PC. Our admonition to you is to be very careful. Make sure you read the information and the documentation related to such freeware. Its installer might contain some additional programs you don’t need, which will be bundled with the initial program of your choice.
Please carefully read the EULAs (End User License Agreements) related to the free software you’re going to install. Also, when you’re in the process of installing anything, always select the option of a custom (advanced) installation. This is the place where you may uncheck all third-party components you don’t need from being implanted into your system by default.
Sometimes users actually fail to pay attention to such important details. As a result, they often click on “Next” and “I agree” buttons, without actually understanding what exactly they agree with. So, this is the way they easily permit various junk applications to become the part of their computers. This is the exact way how Ads by Provider attacked your PC.
To remove this adware from your computer we recommend you to select our automatic adware removal guide. You will need to scan your system with our reliable antispyware program called Plumbytes Anti-Malware, remove all the infections it finds (with its full registered version) and to reset your browsers with its help. In case you require more assistance on our part, please feel free to contact us at any time of your preference.
Software to get rid of Ads by Provider automatically.

Important milestones to delete Ads by Provider automatically are as follows:
- Downloading and installing the program.
- Scanning of your PC with it.
- Removal of all infections detected by it (with full registered version).
- Resetting your browser with Plumbytes Anti-Malware.
- Restarting your computer.
Detailed instructions to remove Ads by Provider automatically.
- Download Plumbytes Anti-Malware through the download button above.
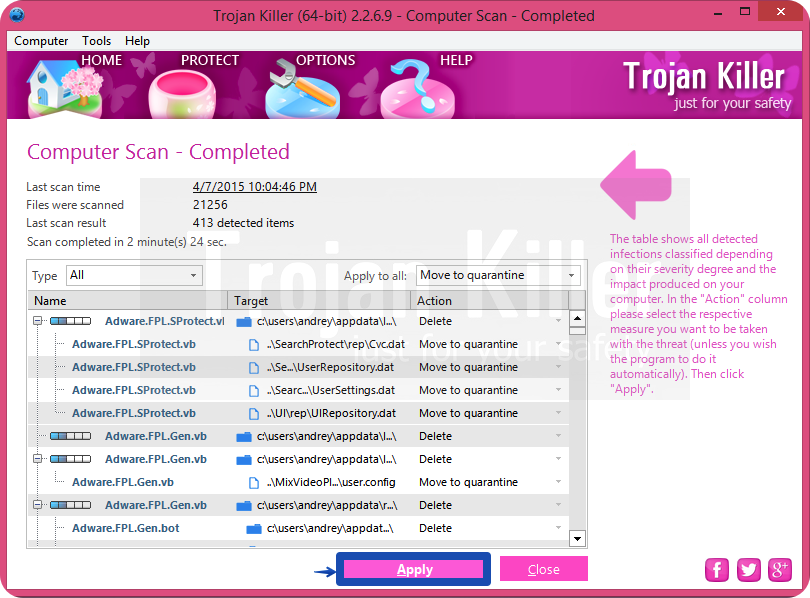
- Install the program and scan your computer with it.
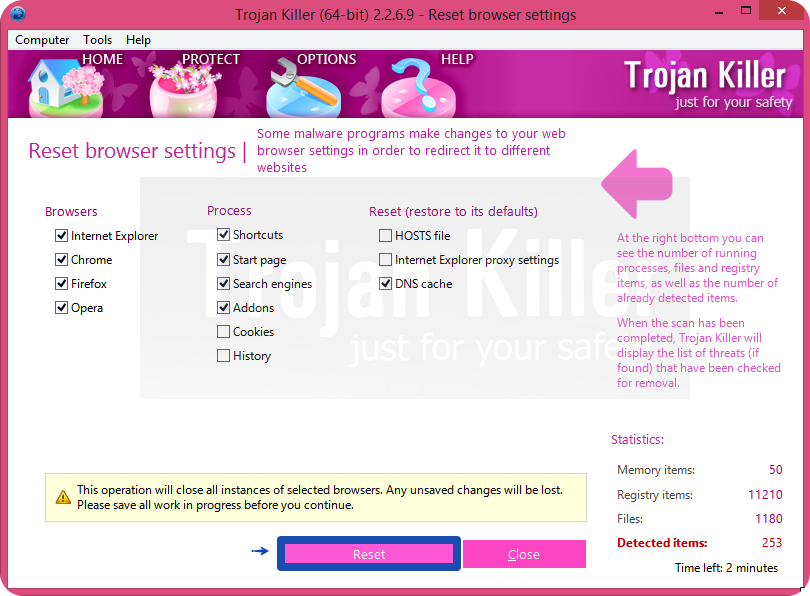
- At the end of scan click “Apply” to remove all infections associated with Ads by Provider:
- Important! It is also necessary that you reset your browsers with Plumbytes Anti-Malware after this particular adware removal. Shut down all your available browsers now.
- In Plumbytes Anti-Malware click on “Tools” tab and select “Reset browser settings“:
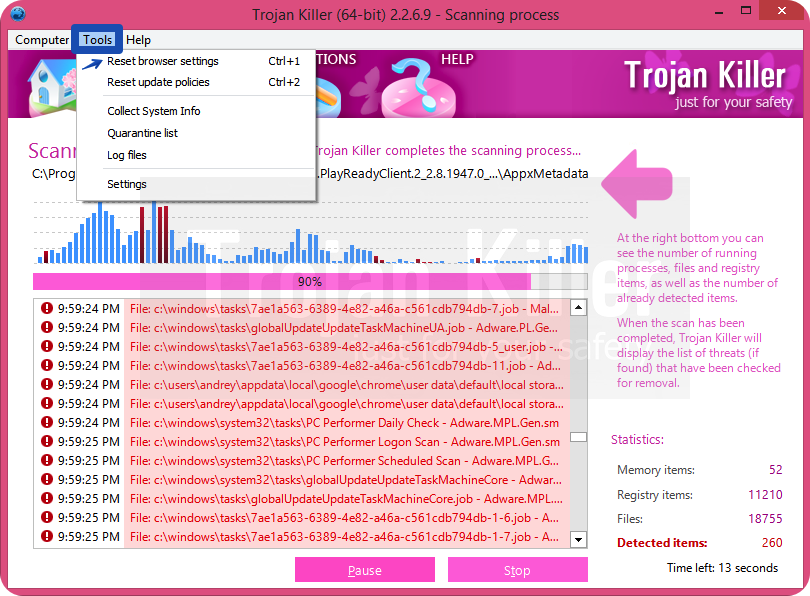
- Select which particular browsers you want to be reset and choose the reset options.
- Click on “Reset” button.
- You will receive the confirmation windows about browser settings reset successfully.
- Reboot your PC now.
Video guide explaining how to reset browsers altogether automatically with Plumbytes Anti-Malware:
Detailed removal instructions to uninstall adware manually
Step 1. Uninstalling this adware from the Control Panel of your computer.
- Make sure that all your browsers infected with Ads by Provider are shut down (closed).
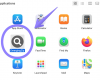
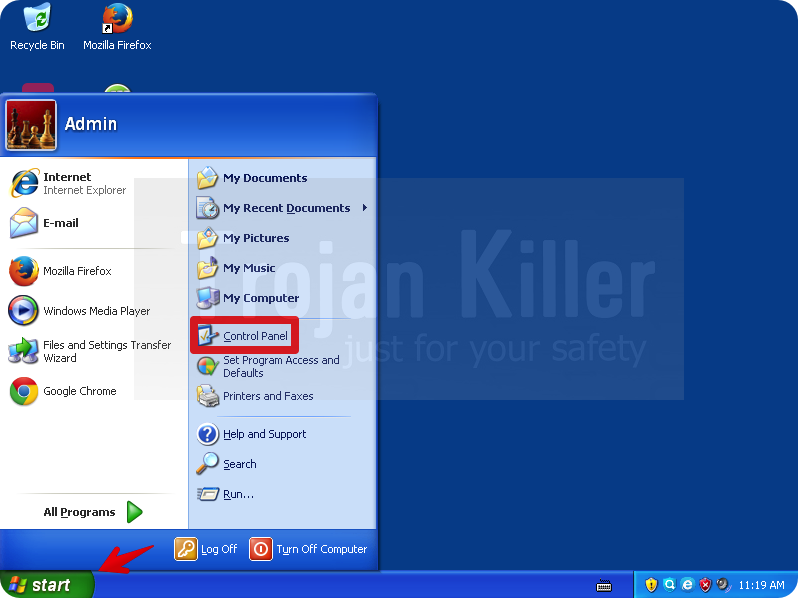
- Click on “Start” and go to the “Control Panel“:
- To access the Control Panel in Windows 8 operating system move the computer mouse towards the left bottom hot corner of Windows 8 screen and right-click on it. In Windows 8.1, simply right-click on the “Start” button. Then click on “Control Panel“:
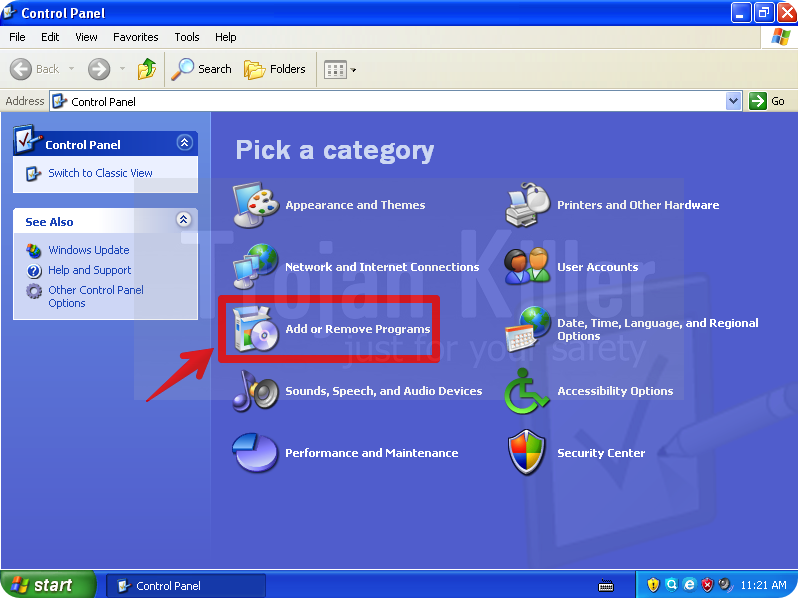
- In Windows XP click on “Add or remove programs“:
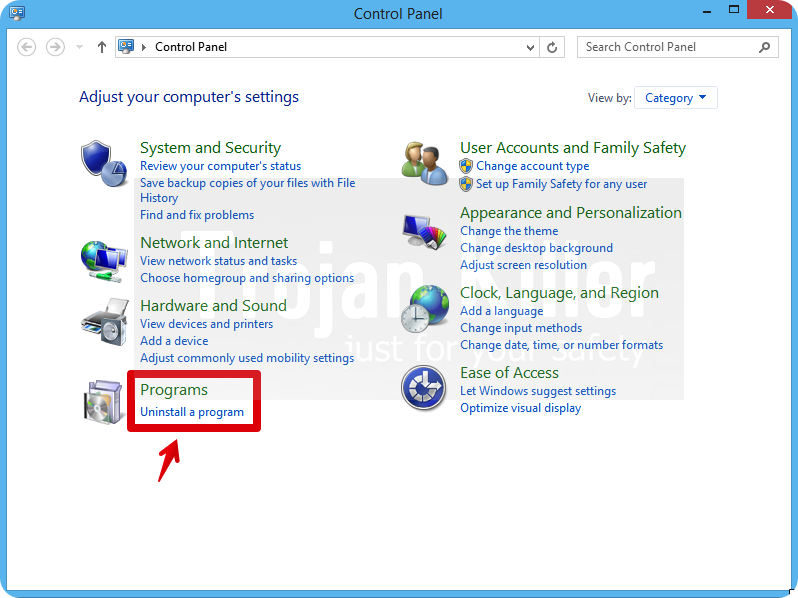
- In Windows Vista, 7, 8 and 8.1 click on “Uninstall a program“:
- Uninstall suspicous adware. To do it, in Windows XP click “Remove” button related to it. In Windows Vista, 7, 8 and 8.1 right-click on this adware with the PC mouse and click on “Uninstall / Change“.

Step 2. Removing adware from the list of add-ons and extensions of your browser.
In addition to removal of adware from the Control Panel of your PC as explained above, you also need to remove this adware from the add-ons or extensions of your browser. Please follow this guide for managing browser add-ons and extensions for more detailed information. Remove any items related to this adware and other unwanted applications installed on your PC.
How to prevent your PC from being reinfected:
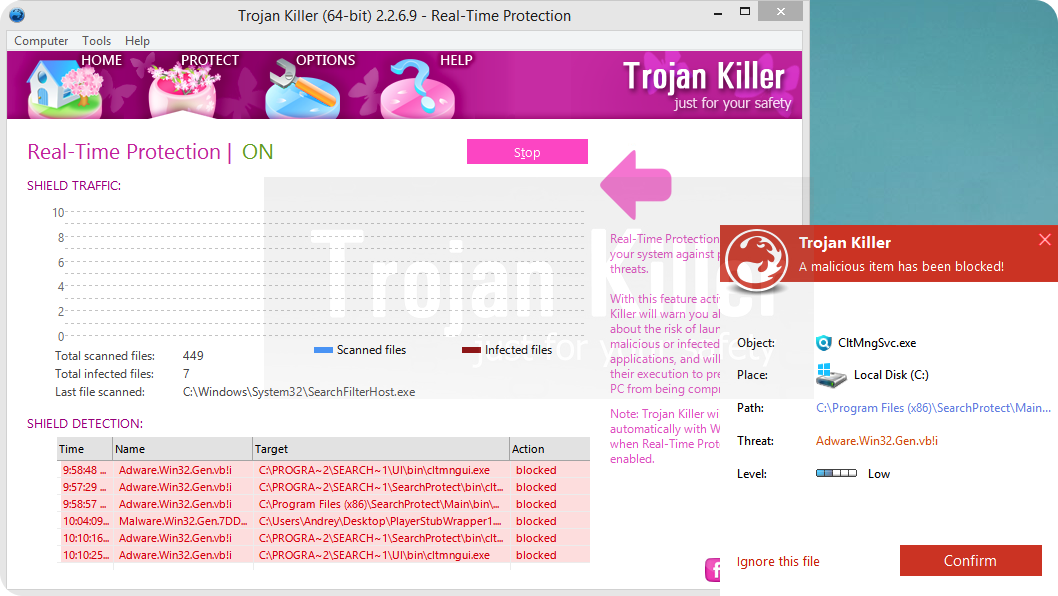
Plumbytes Anti-Malware offers a superb service to prevent malicious programs from being launched in your PC ahead of time. By default, this option is disabled once you install Anti-Malware. To enable the Real-Time Protection mode click on the “Protect” button and hit “Start” as explained below:
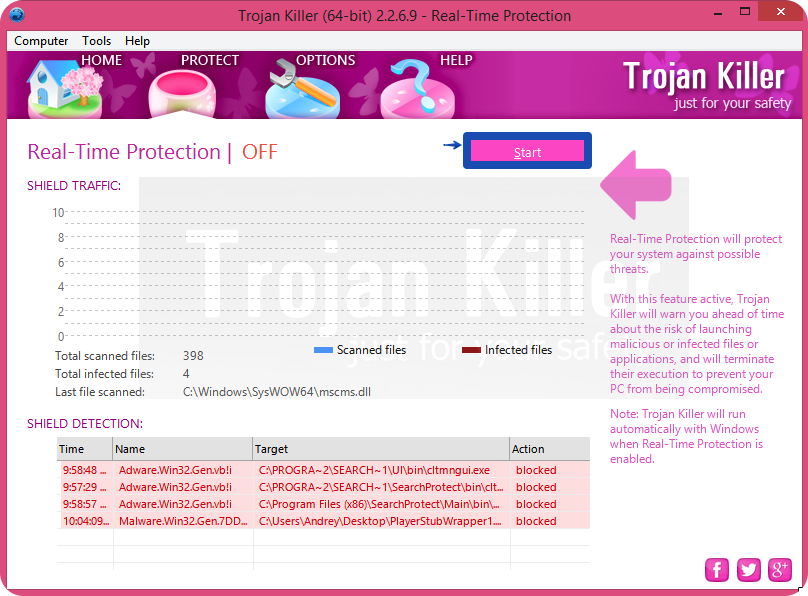
Once this option is enabled, your computer will be protected against all possible malware attacking your PC and attempting to execute (install) itself. You may click on the “Confirm” button to continue blocking this infected file from being executed, or you may ignore this warning and launch this file.