There have been few complaints about some unusual Ads by Shoppi to pop up. This problem may actually occur with all major browsers today, including Google Chrome, Opera, Mozilla Firefox and Internet Explorer. All such ads are powered by a nasty adware currently infecting many computers in the places where Internet is available. Users see these ads and don’t know how to get rid of them effectively. In this tutorial you will find the solution for complete removal of such advertisements from your computer in an effective way.

Shoppi ads don’t come into PCs by themselves. This adware is most likely bundled with some other free application. No doubt, we all need to be very careful today whenever we install any free application into our computers. Let us always make sure we don’t permit any junk applications to easily become the part of our systems by default. For this purpose it is very important to always carefully read the EULAs, also known as the End User License Agreements related to all free applications we’re going to install. Let us make sure we know all the details regarding the installation we’re going to implement. So, in case we do find the information about Shoppi or any other adware suggested for us to be installed into the PC by default, we need to select the option of the custom or advanced installation, instead of the standard one. This will help us to avoid all unpleasant surprises related to adware installation without our desire or intention.
Shoppi adware removal menu:
- Recommended software to remove adware automatically.
- Resetting browser settings after automatic removal of adware.
- Video explaining how to reset your browsers affected by adware.
- Tutorial to remove adware manually.
- How to prevent your PC from being reinfected.
Shoppi Ads are truly very annoying. They appear no matter what website you actually go to. Most often though these ads may come up when you visit various e-commerce websites like Walmart, Amazon, Ebay, Bestbuy, etc. In addition to intrusive Ads by Shoppi you may see a lot of sudden pop-up windows to come up unexpectedly. You will notice that your browser will redirect you to various strange third-party websites which will prompt you into downloading and installing something. Well, this is surely very dangerous. You must not trust any deceptive statements mentioned by such intrusive pop-ups, which are also powered by Shoppi adware.
Your system infected by Shoppi adware may function extremely slow. You will notice this because of high CPU usage and consumption of many system resources on the part of this adware. Hence, you definitely need to get rid of this nasty program as soon as you identify its presence in your computer.
Removal of Ads by Shoppi can be done effectively if you scan your system with a reliable antispyware program, such as Plumbytes Anti-Malware. This is a truly one of the best malware removal solutions as per today. The team of Plumbytes malware analysts work days and nights to make sure the software is capable to kill the sneakiest malware. Note that the actual malware removal can be done with the full registered version of Anti-Malware. Finally, remember that you also need to reset your browsers with its help. In case you require more assistance on our part, please feel free to contact us at any time of your preference.
Software to get rid of Shoppi Ads automatically.

Important milestones to delete Shoppi Ads automatically are as follows:
- Downloading and installing the program.
- Scanning of your PC with it.
- Removal of all infections detected by it (with full registered version).
- Resetting your browser with Plumbytes Anti-Malware.
- Restarting your computer.
Detailed instructions to remove Shoppi adware automatically.
- Download Plumbytes Anti-Malware through the download button above.
- Install the program and scan your computer with it.
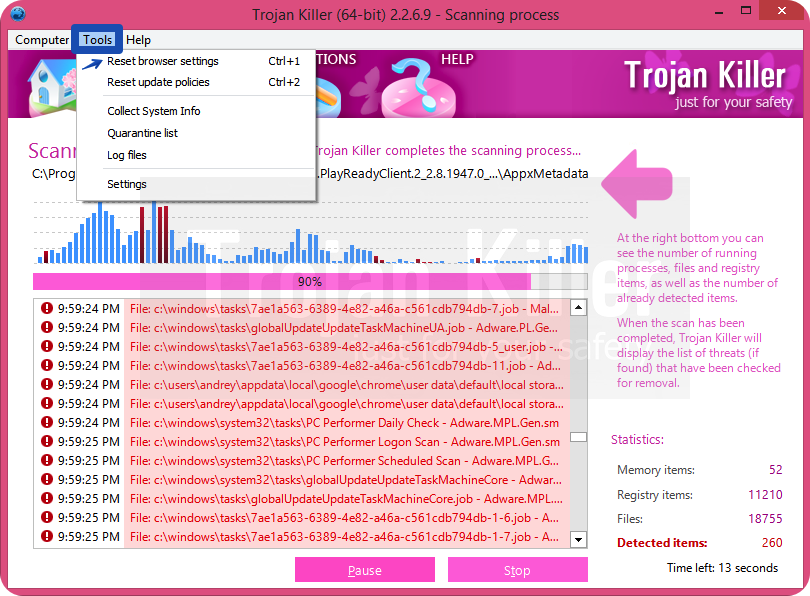
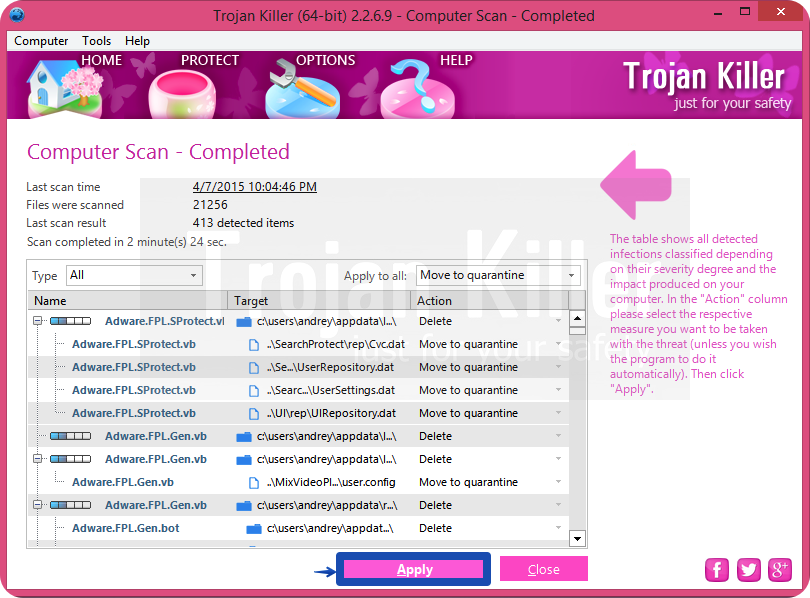
- At the end of scan click “Apply” to remove all infections associated with Shoppi adware:
- Important! It is also necessary that you reset your browsers with Plumbytes Anti-Malware after this particular adware removal. Shut down all your available browsers now.
- In Plumbytes Anti-Malware click on “Tools” tab and select “Reset browser settings“:
- Select which particular browsers you want to be reset and choose the reset options.
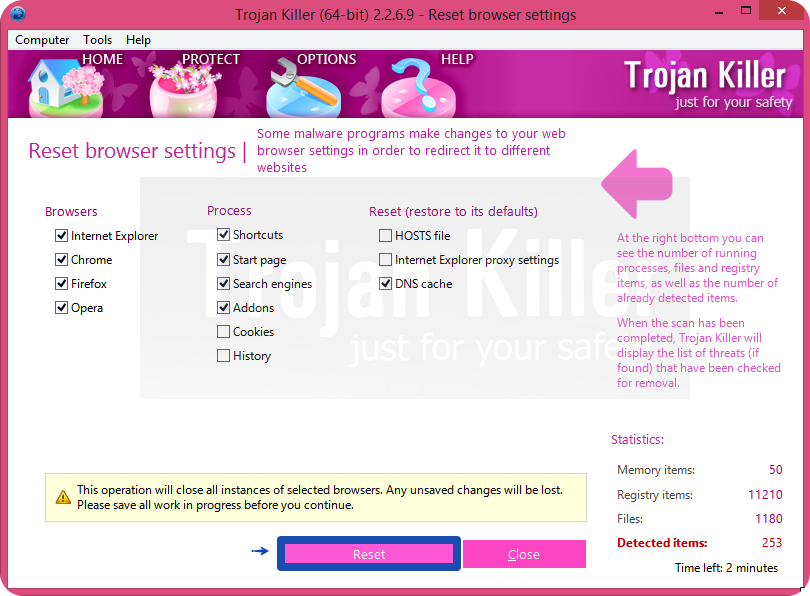
- Click on “Reset” button.
- You will receive the confirmation windows about browser settings reset successfully.
- Reboot your PC now.
Video guide explaining how to reset browsers altogether automatically with Plumbytes Anti-Malware:
Detailed removal instructions to uninstall Shoppi adware manually
Step 1. Uninstalling this adware from the Control Panel of your computer.
- Make sure that all your browsers infected with Shoppi adware are shut down (closed).
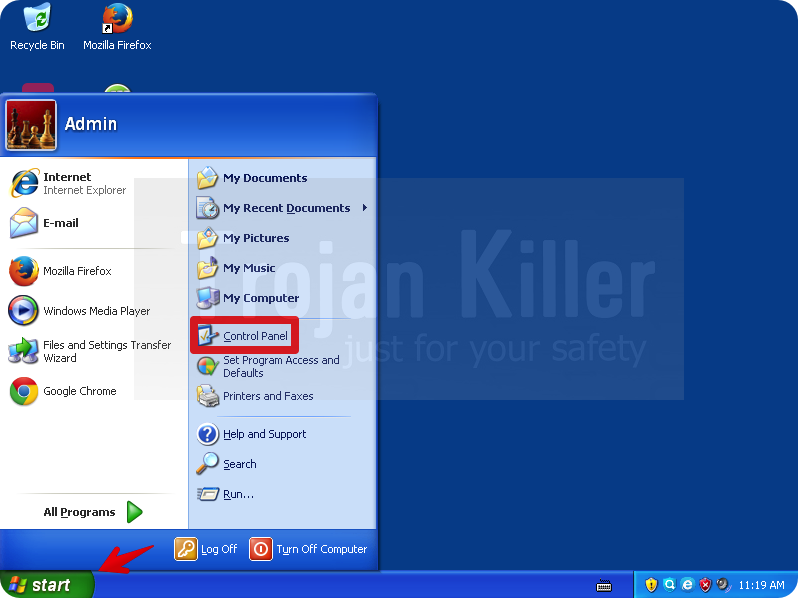
- Click on “Start” and go to the “Control Panel“:
- To access the Control Panel in Windows 8 operating system move the computer mouse towards the left bottom hot corner of Windows 8 screen and right-click on it. In Windows 8.1, simply right-click on the “Start” button. Then click on “Control Panel“:
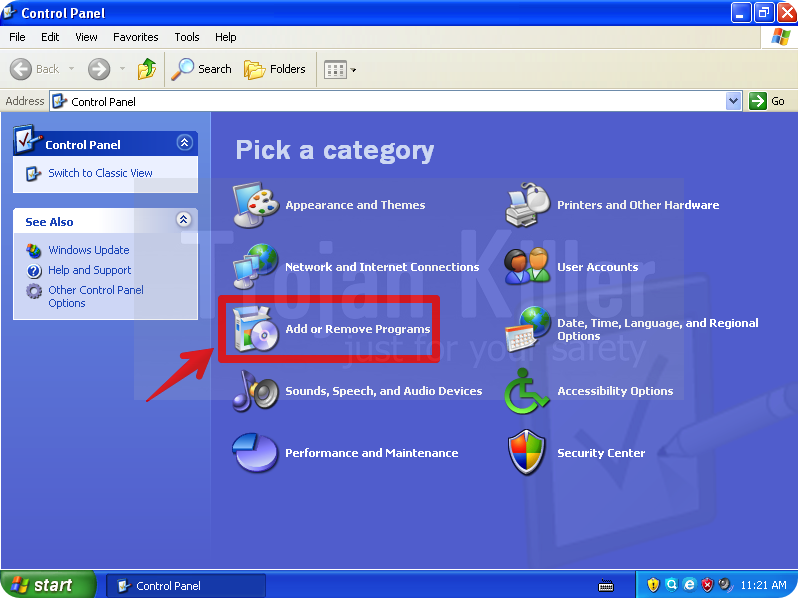
- In Windows XP click on “Add or remove programs“:
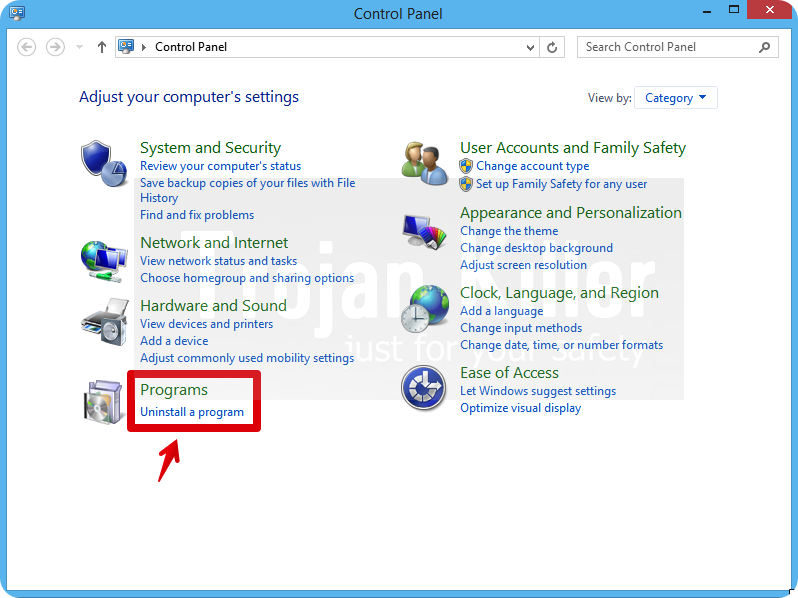
- In Windows Vista, 7, 8 and 8.1 click on “Uninstall a program“:
- Uninstall Shoppi adware. To do it, in Windows XP click “Remove” button related to it. In Windows Vista, 7, 8 and 8.1 right-click on this adware with the PC mouse and click on “Uninstall / Change“.

Step 2. Removing adware from the list of add-ons and extensions of your browser.
In addition to removal of adware from the Control Panel of your PC as explained above, you also need to remove this adware from the add-ons or extensions of your browser. Please follow this guide for managing browser add-ons and extensions for more detailed information. Remove any items related to this adware and other unwanted applications installed on your PC.
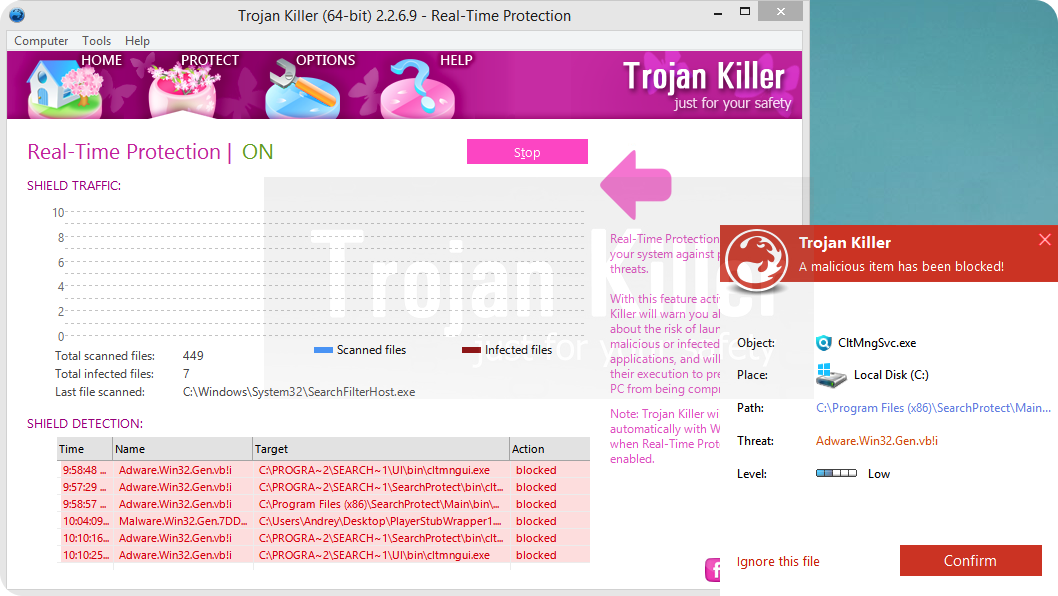
How to prevent your PC from being reinfected:
Plumbytes Anti-Malware offers a superb service to prevent malicious programs from being launched in your PC ahead of time. By default, this option is disabled once you install Anti-Malware. To enable the Real-Time Protection mode click on the “Protect” button and hit “Start” as explained below:
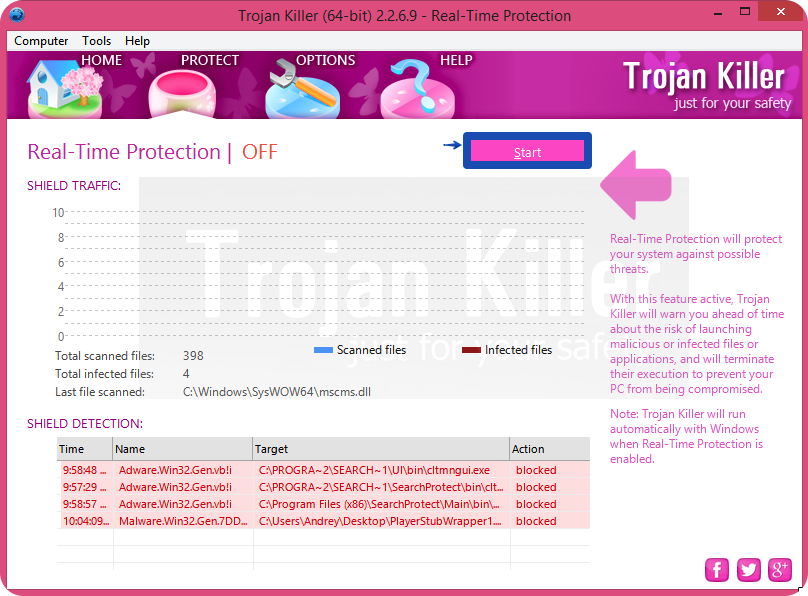
Once this option is enabled, your computer will be protected against all possible malware attacking your PC and attempting to execute (install) itself. You may click on the “Confirm” button to continue blocking this infected file from being executed, or you may ignore this warning and launch this file.