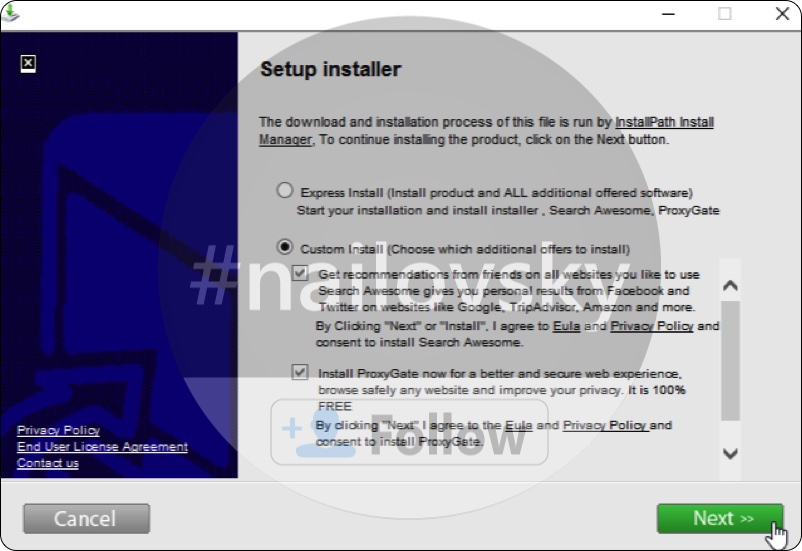
What do you think of Ads by Search Awesome popping up in your screen right now? Most likely you’re quite fed up facing them all the time, aren’t you? Believe us, you’re not the only person who experiences this very problem right now. Thousands if not millions of PCs have been contaminated with this disgusting adware as a result of user’s failure to be attentive online. The name of the adware causing these ads is called Search Awesome.
Search Awesome adware removal menu.
Ways to prevent Search Awesome adware.
Instructions for removal of Search Awesome.
Instructions to remove Search Awesome from Windows computers.
Tips to delete Search Awesome manually.
How does your browser work when Search Awesome Ads are enabled in it?
You may notice Search Awesome program to be displayed in the list of legally installed software of your computer. Also, there may be certain add-ons (extensions) related to this adware in your browser. Once the adware successfully comes into the system, it will start displaying a lot of “Ads by Search Awesome”, “brought by Search Awesome”, “powered by Search Awesome”, etc. In some cases these pop-up advertisements will be titled in the local language – “drive av Search Awesome” (for the Netherlands).
This adware doesn’t really help users to find what they need to find online. It pursues the only goal – to make the people who stand behind it richer. The program was simply not designed to assist users in finding what they need. Whenever you click on these Ads by Search Awesome or attempt to buy something through them, the owners and the distributors of this application get paid. Yet, you will not be able to save less money through purchasing any commodities by means of this adware.
How to remove Search Awesome adware from acting in your system?
PCs infected by Search Awesome adware work very slow. This is true even if you use some brand new computer you’ve just purchased. So, it got infected after you installed some free program which was bundled with adware. Your mistake can be fixed by scanning a reliable antivirus program. Choose Anti-Malware Pro 2017 for this purpose and remove this infection effectively.
Search Awesome adware removal instructions.
Instructions to clean Windows computers.
This slider below shows how to use Anti-Malware Pro 2017 for Search Awesome detection and removal:

Step 1. Download the program by clicking on the appropriate download button below. Then click on "Continue" to proceed with installation process of of Anti-Malware Pro 2017.
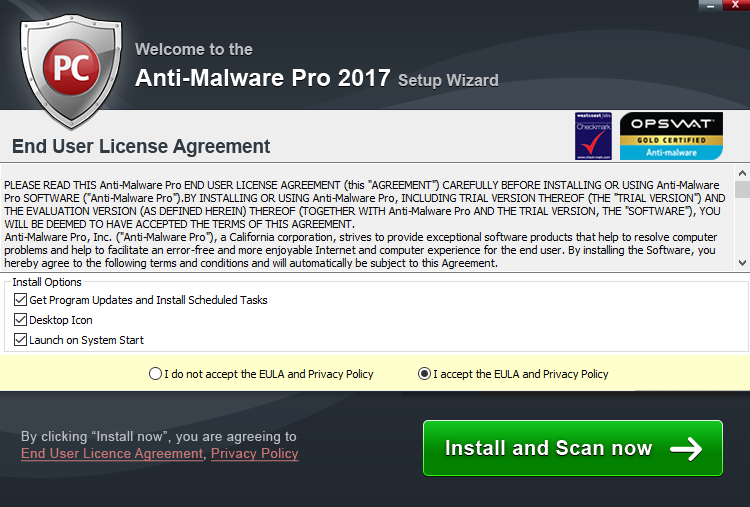
Step 2. Click on "Install and Scan Now".
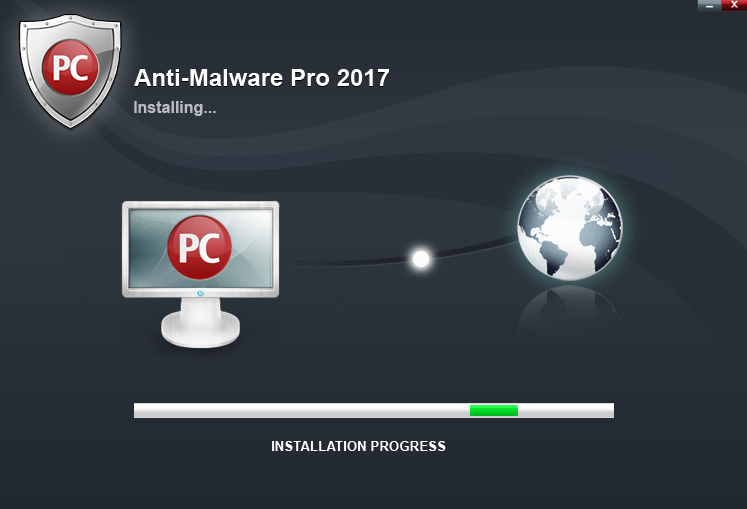
Step 3. Compete installation process.
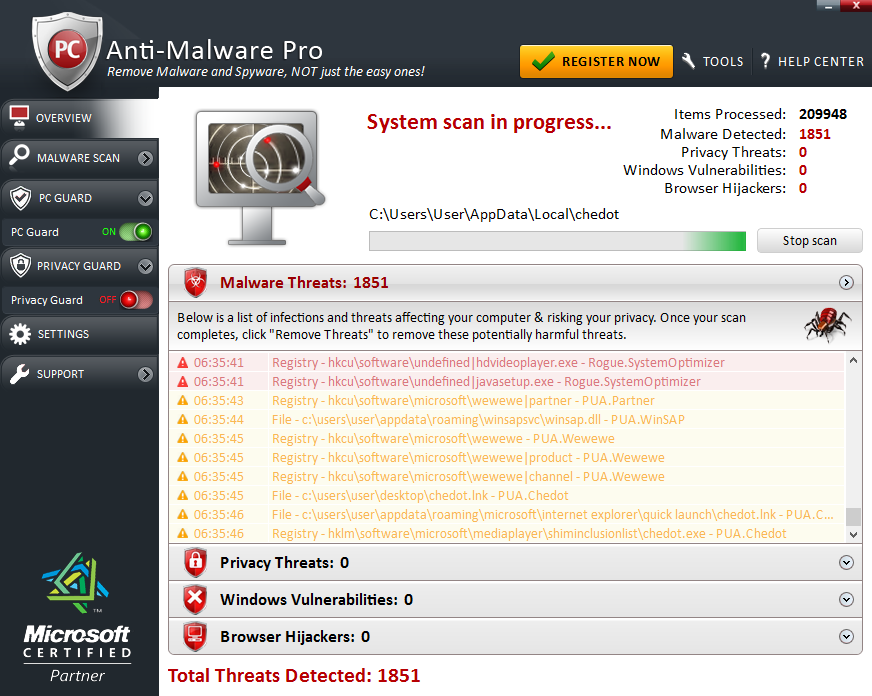
Step 4. The program will start scanning your computer.
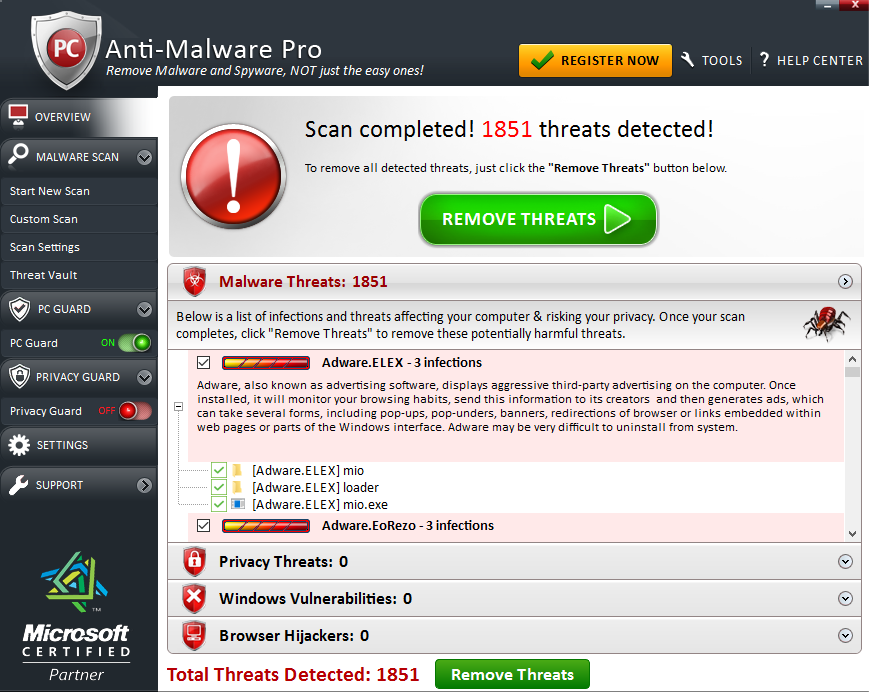
Step 5. Click on "Remove Threats".
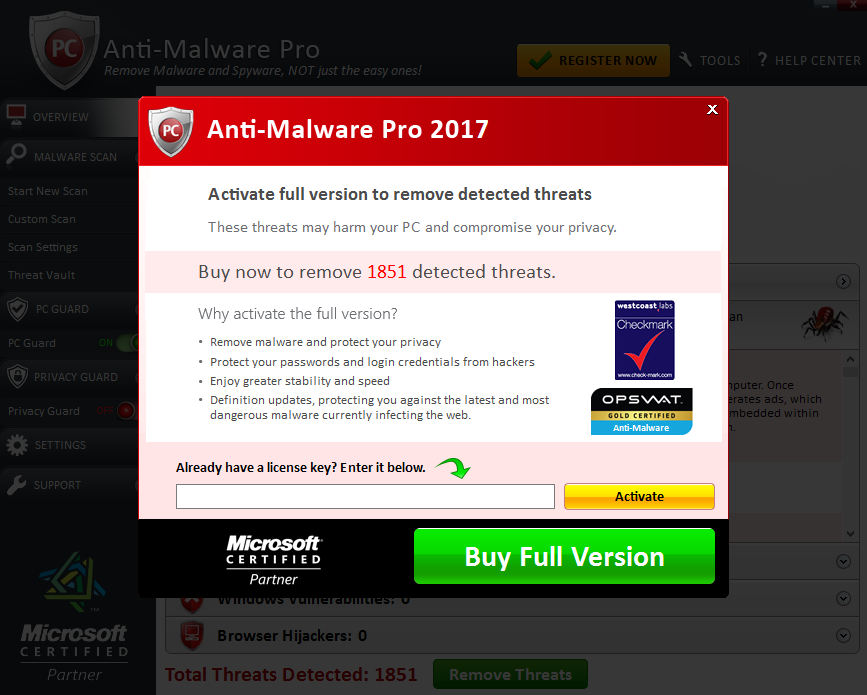
Step 6. Click on "Buy full version".
- Download Anti-Malware Pro 2017 via the download button below:
- Install the application and start it. The program will automatically begin scanning your computer.
- Once the scanning is completed, click on “Remove Threats“.
- Purchase the full version of the software.
- Check your email to retrieve your license key.
- Enter the license key in the respective section, then activate the software.
- With registered version of the program, get rid of all malware from your PC.
- Repeat scanning if necessary.
Solution to protect your computer from getting contaminated with Search Awesome and similar threats in the future:
With millions of malicious applications currently in the web people definitely need powerful security solutions for their PCs. You could have avoided all negative side effects related to unwanted intrusion of adware with the help of Anti-Malware Pro 2017, so we strongly advise that you buy Anti-Malware Pro 2017 now!
After you eliminate Search Awesome it is mandatory to apply additional manual fixes to clean your browsers from malware traces.
[TABS_R id=7864]