Nes.dilutionbarberryplangent.com stands for a malicious website which may infect your PC with a lot of malicious software. We can’t say that all programs it recommends for downloads and installations are malicious; on the other hand, these aren’t any decent applications either. You may see such pop-ups in your browser if it got infected by some adware. Believe us, we know what it takes to see so many pop-up windows in your browser all the time. Let us talk today about how to eliminate them effectively from your system.
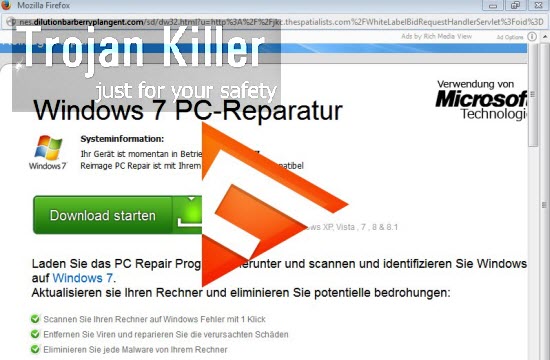
Note that nes.dilutionbarberryplangent.com pop-ups are fully powered by the adware which is now a part of your PC and your browser. When you open any website you may be soon redirected to this domain name. What you should realize is that it is extremely dangerous for you to click on them! Even if you’ve just seen such pop-ups, this isn’t that bad yet until you do what they instruct you to do.
Most often such pop-ups may tell you to download other programs. Sometimes (and even quite often) you might see some scary information presented through this domain name about all sorts of problems with your system. As a supposed “solution” you will be “recommended” in such tricky offers to download some utilities which are advertised as capable of fixing such issues. In reality, these programs aren’t worthy of a cent of Zimbabwe dollar. They will prompt you into buying their full version, which is the total waste of your funds. You will not gain any benefit from such software recommended in these nes.dilutionbarberryplangent.com pop-ups.
Again and again, we strongly warn you not to click on these pop-up windows you might see in your browser. This is dangerous! The adware which spews them out probably has been installed personally by you as a result of installing other free programs (which were bundled with this adware). In order to fix this serious issue with your PC and your browser infected by adware we recommend you to scan your system with Plumbytes Anti-Malware, a powerful antimalware tool. You will need to remove all malicious files and registry entries detected by it (with its full registered version), and to reset your browser with its help.
The last but not the least, please be extremely careful when you surf the world wide web and especially when you install any free applications into your computer. Note that there is a huge number of free applications which may be bundled with all sorts of other absolutely not necessary programs. If you don’t pay enough attention during the installation programs, you may end up facing a lot of other absolutely unwanted programs (like adware causing nes.dilutionbarberryplangent.com pop-ups). So, please read carefully what exactly you’re installing. Make sure to share this information with your friends, relatives or colleagues who might have the same sort of problem with their PCs and browsers.
Software for automatic removal of annoying pop-ups caused by adware:

Important steps for removal of annoying pop-ups caused by adware:
- Downloading and installing the program.
- Scanning of your PC with it.
- Removal of all infections detected by it (with full registered version).
- Resetting your browser with Plumbytes Anti-Malware.
- Restarting your computer.
Similar adware removal video:
Detailed removal instructions to get rid of dtw.getupslipperyskullcap.com pop-ups
Step 1. Uninstalling any suspicious adware from the Control Panel of your computer.
Instructions for Windows XP, Vista and 7 operating systems:
- Make sure that all your browsers infected by adware are shut down (closed).
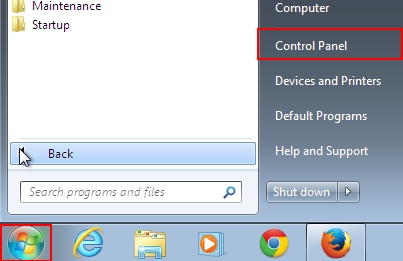
- Click on “Start” and go to the “Control Panel“:
- In Windows XP click on “Add or remove programs“:
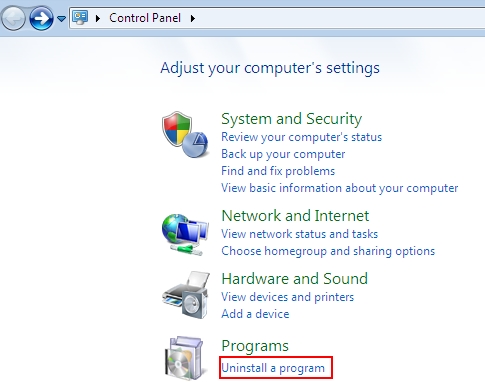
- In Windows Vista and 7 click on “Uninstall a program“:
- Uninstall suspicious adware which might cause annoying pop-ups. To do it, in Windows XP click on “Remove” button related to such adware. In Windows Vista and 7 right-click on this adware program with the PC mouse and click on “Uninstall / Change“.

Instructions for Windows 8 operating system:
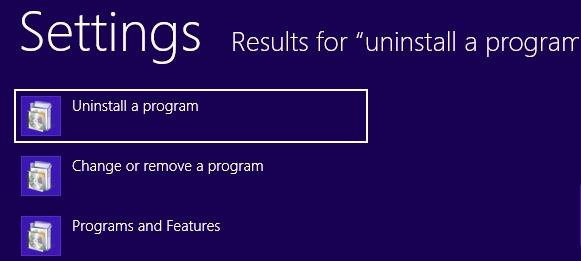
- Move the PC mouse towards the top right hot corner of Windows 8 screen, click on “Search“:
- Type “Uninstall a program“, then click on “Settings“:
- In the left menu that has come up select “Uninstall a program“:
- Uninstall suspicious adware program. To do it, in Windows 8 right-click on any suspicious adware program with the PC mouse and click on “Uninstall / Change“.


Step 2. Removing suspicious adware from the list of add-ons and extensions of your browser.
In addition to removal of adware from the Control Panel of your PC as explained above, you also need to remove this adware from the add-ons or extensions of your browser. Please follow this guide for managing browser add-ons and extensions for more detailed information. Remove any items related to this adware and other unwanted applications installed on your PC.
Step 3. Scanning your computer with reliable and effective security software for removal of all adware remnants.
- Download Plumbytes Anti-Malware through the download button above.
- Install the program and scan your computer with it.
- At the end of scan click on “Apply” to remove all infections associated with this adware.
- Important! It is also necessary that you reset your browsers with Plumbytes Anti-Malware after this particular adware removal. Shut down all your available browsers now.
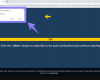
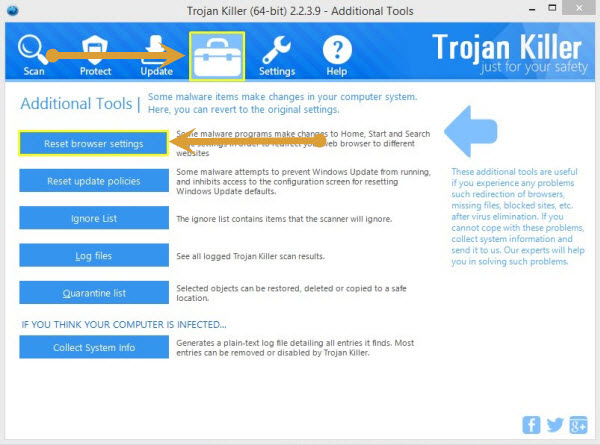
- In Plumbytes Anti-Malware click on “Tools” tab and select “Reset browser settings“:
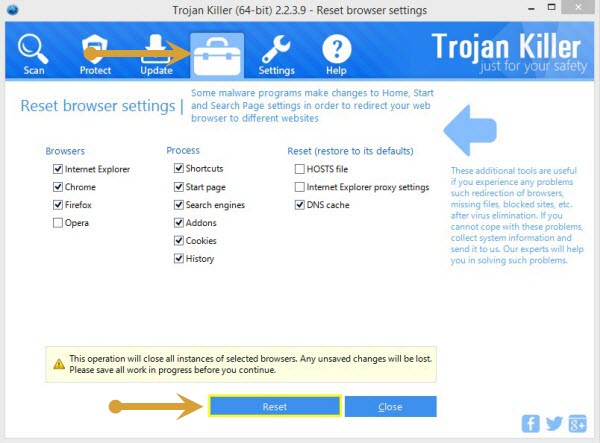
- Select which particular browsers you want to be reset and choose the reset options.
- Click on “Reset” button.
- You will receive the confirmation windows about browser settings reset successfully.
- Reboot your PC now.
![Hhyu ransomware [.hhyu file virus]](https://www.system-tips.net/wp-content/uploads/2022/07/hhu-100x80.png)