It is true that WikiBrowser is a browser through which you may open web pages. On the other hand, we believe that you should immediately remove it from your computer. It is a shameless counterfeit copy of Google Chrome. Today different free applications are by default integrated with it. The fact is that when you install it as a result of your failure to be attentive, WikiBrowser will replace all other browsers with itself.
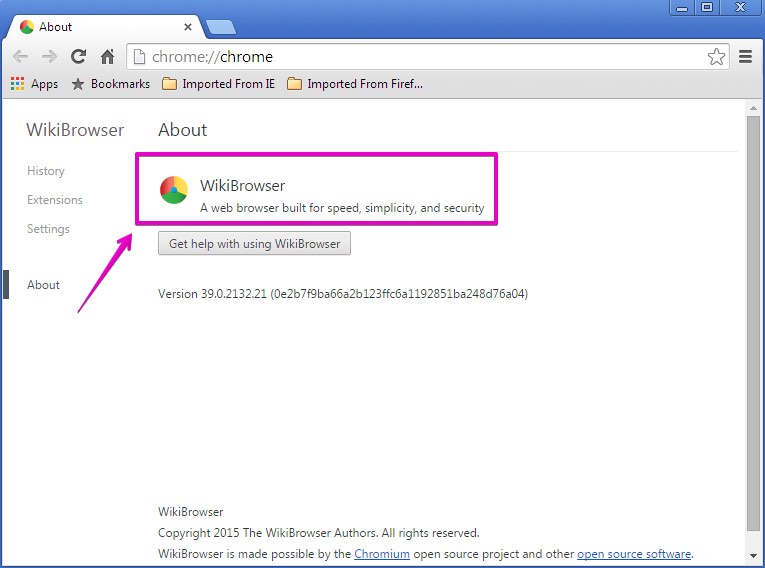
Presence of WikiBrowser in your system may be traced by a special process called “wikibrowser.exe”. You will notice several of such active processes when you open the Task Manager application of your computer. When you try to uninstall WikiBrowser from your PC in a regular way you may fail to do so effectively. This is because you will first need to stop all running “wikibrowser.exe” processes.
WikiBrowser removal menu:
- Recommended software to remove WikiBrowser automatically.
- Resetting browser settings after automatic removal of WikiBrowser.
- Video explaining how to reset your browsers affected by WikiBrowser.
- Tutorial to remove WikiBrowser manually.
- How to prevent your PC from being reinfected.
In addition to the presence of WikiBrowser and inability to use other browsers, you will start facing a lot annoying Ads by WikiBrowser while you surf the world wide web. When you may some queries through this pseudo browser you will as well see these “Ads by WikiBrowser” on the top of those irrelevant search results redirected through it. As a result, you may notice that your PC now functions extremely slow and may even freeze. In fact, you may be unable to use it at all.
Many people as per today have discovered WikiBrowser to infect their computers. This issue is possible to happen in all places where Internet is accessible. The application may practically be integrated with all major free software. You must be extremely careful whenever you download or install anything for free. Make sure you always understand what exactly you’re going to make the part of your PC in addition to the main software of your selection.
WikiBrowser will also display a lot of intrusive Ads by WikiBrowser, as we’ve said above. You will be quite fed up to observe them all the time. Finally, through these advertisements your PC may become even more infected with all kids of useless and even hazardous applications.
Keep in mind that WikiBrowser considerably slows down the operation of your PC. You may encounter its ads in different parts of the screen, plus you will see that the software consumes a lot of system resources from your computer. As a consequence, your system may freeze and your browser may often crash.
To remove WikiBrowser and its Ads by WikiBrowser from your system please carefully follow the removal tips set forth in the remainder of the articvle below. You will need to scan your PC with a reliable antivirus application, get rid of all the threats it find and to reset your browsers with its aid. In case you need more assistance on our part, please feel free to get in touch with us without hesitation.
Software to get rid of WikiBrowser automatically.

Important milestones to delete WikiBrowser automatically are as follows:
- Downloading and installing the program.
- Scanning of your PC with it.
- Removal of all infections detected by it (with full registered version).
- Resetting your browser with Plumbytes Anti-Malware.
- Restarting your computer.
Detailed instructions to remove WikiBrowser automatically.
- Download Plumbytes Anti-Malware through the download button above.
- Install the program and scan your computer with it.
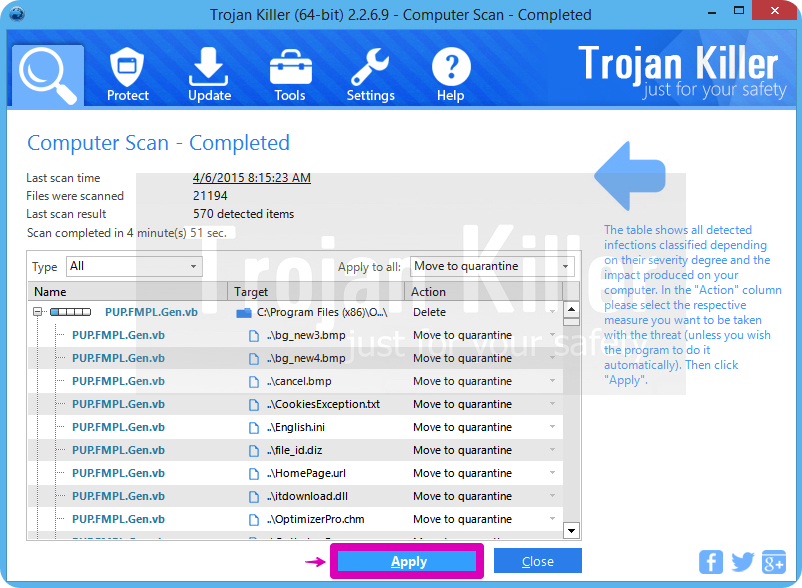
- At the end of scan click “Apply” to remove all infections associated with WikiBrowser:
- Important! It is also necessary that you reset your browsers with Plumbytes Anti-Malware after removal of WikiBrowser. Shut down all your available browsers now.
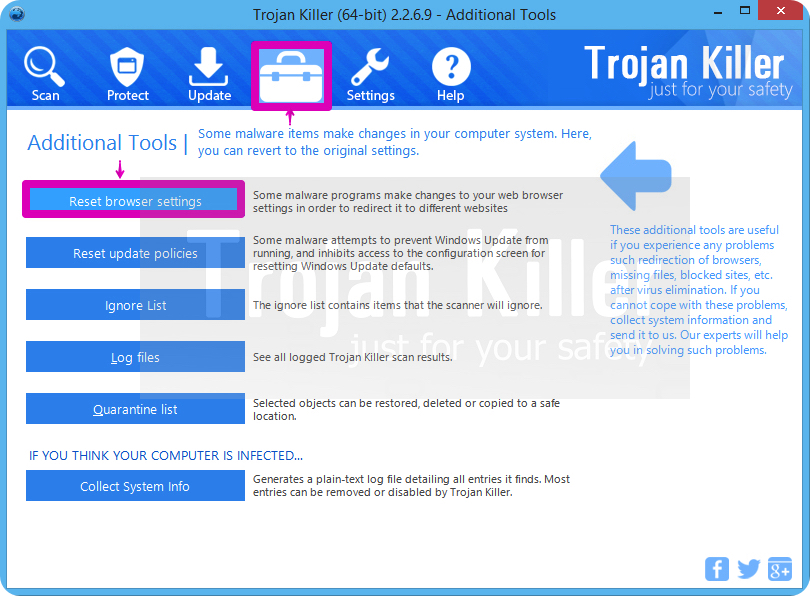
- In Plumbytes Anti-Malware click on “Tools” tab and select “Reset browser settings“:
- Select which particular browsers you want to be reset and choose the reset options.
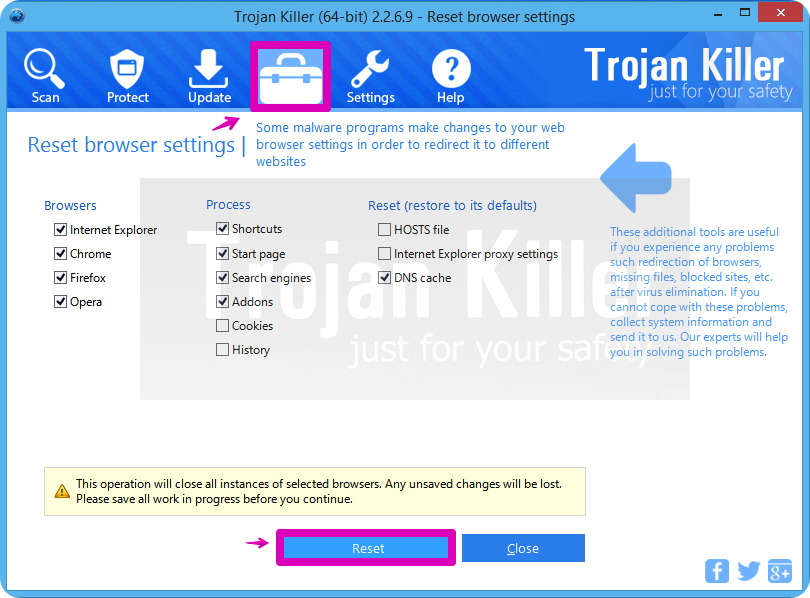
- Click on “Reset” button.
- You will receive the confirmation windows about browser settings reset successfully.
- Reboot your PC now.
Video guide explaining how to reset browsers altogether automatically with Plumbytes Anti-Malware:
Detailed removal instructions to uninstall WikiBrowser manually
Step 1. Uninstalling suspicious applications from the Control Panel of your computer.
- Make sure that all your browsers infected with WikiBrowser are shut down (closed).
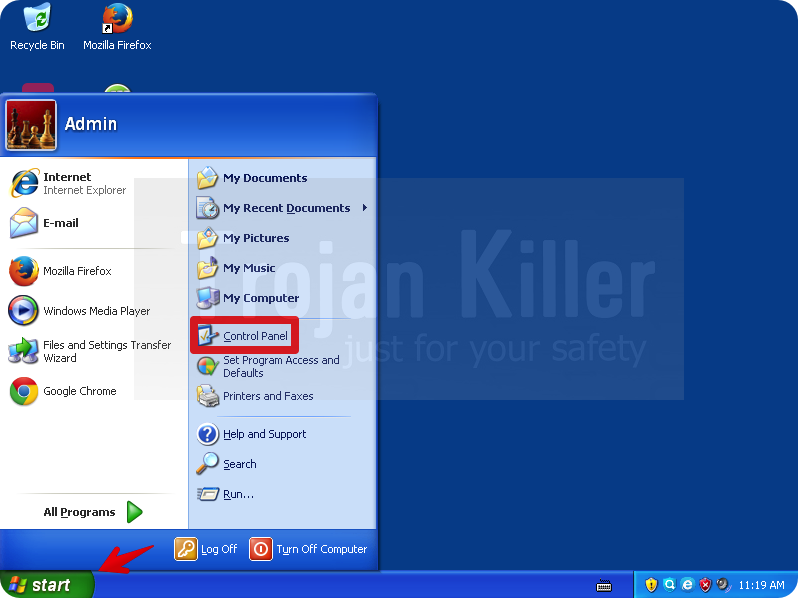
- Click on “Start” and go to the “Control Panel“:
- To access the Control Panel in Windows 8 operating system move the computer mouse towards the left bottom hot corner of Windows 8 screen and right-click on it. In Windows 8.1, simply right-click on the “Start” button. Then click on “Control Panel“:
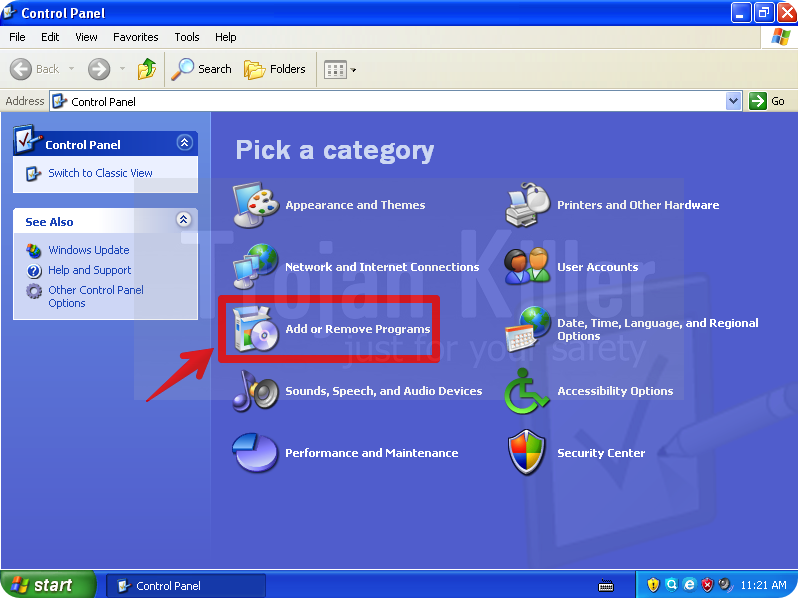
- In Windows XP click on “Add or remove programs“:
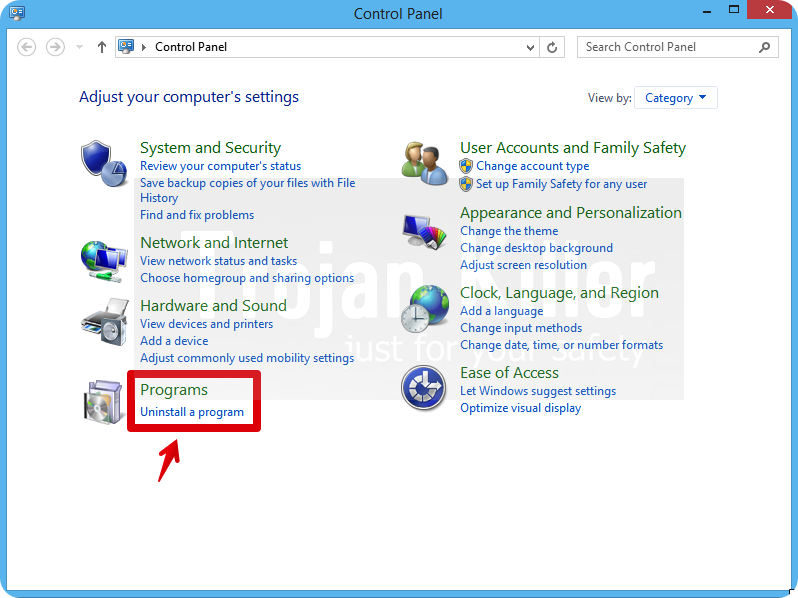
- In Windows Vista, 7, 8 and 8.1 click on “Uninstall a program“:
- Uninstall any suspicious applications which may be related to WikiBrowser. To do it, in Windows XP click “Remove” button related to such applications. In Windows Vista, 7, 8 and 8.1 right-click on certain suspicious program with the PC mouse and click on “Uninstall / Change“.

Step 2. Removing suspicious elements from the list of add-ons and extensions of your browser.
In addition to removal of suspicious programs from the Control Panel of your PC as explained above, you also need to remove suspicious items from the add-ons or extensions of your browser. Please follow this guide for managing browser add-ons and extensions for more detailed information. Remove any items related to this browser hijacker and other unwanted applications installed on your PC.
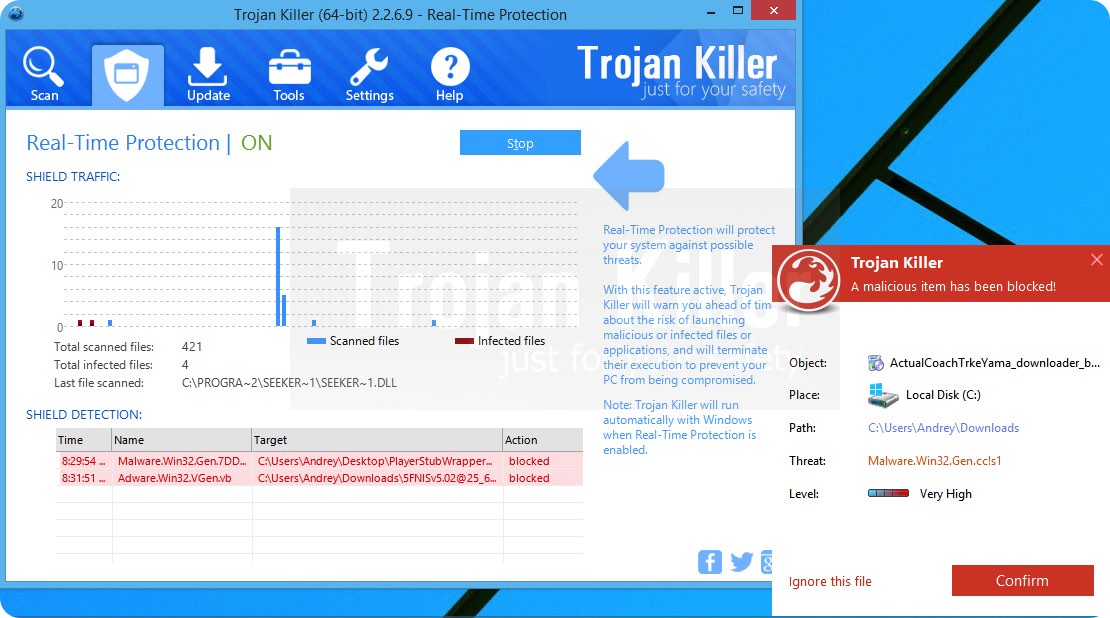
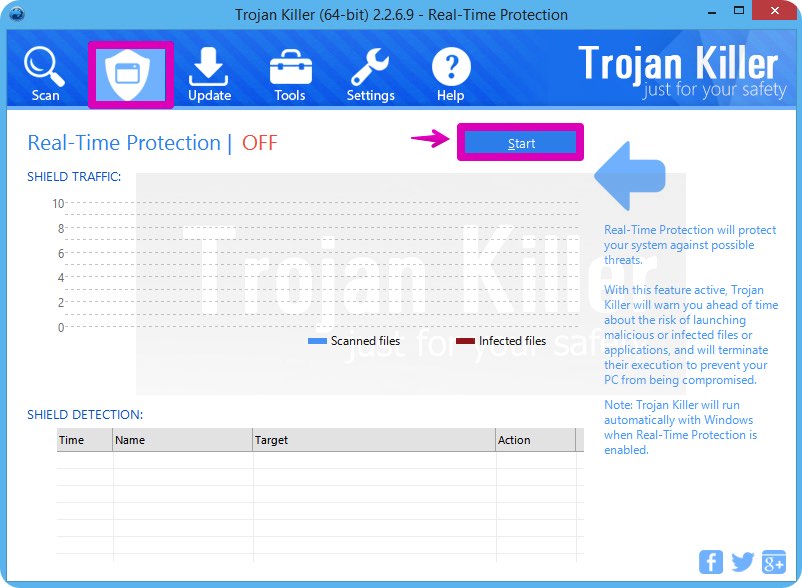
How to prevent your PC from being reinfected:
Plumbytes Anti-Malware offers a superb service to prevent malicious programs from being launched in your PC ahead of time. By default, this option is disabled once you install Anti-Malware. To enable the Real-Time Protection mode click on the “Protect” button and hit “Start” as explained below:
Once this option is enabled, your computer will be protected against all possible malware attacking your PC and attempting to execute (install) itself. You may click on the “Confirm” button to continue blocking this infected file from being executed, or you may ignore this warning and launch this file.