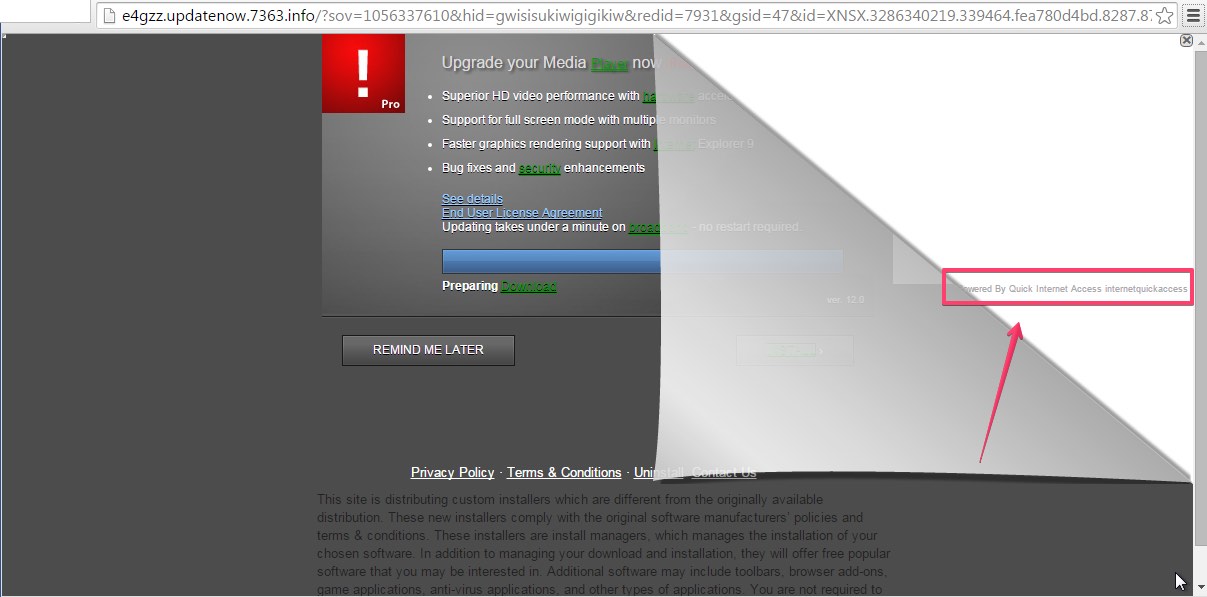
Ads powered by Quick Internet Access may be seen in various corners of your screen. If this problem occurs, this is the evidence of a problem to have happened with your browser. The issue is caused by the presence of Internet Quick Access Browser, also known as iQa Browser. It replaces all major browsers like Internet Explorer, Google Chrome, Opera and Mozilla Firefox with its own one. Plus, users start facing a lot such annoying Ads powered by Quick Internet Access in various corners of their PC screens.
To fix the above-mentioned problem you need to locate the source of the problem and to remove it from your computer. Basically, you may just go ahead to the Control Panel of your PC and uninstall this third-party useless browser from your computer. However, in some cases the problem will persist and ads will continue to appear. What needs to be done is a complex malware cleanup of your computer. Most likely you not only need to get rid of Internet Quick Access browser but to delete some other strange and harmful applications from your computer.
Quick Internet Access adware removal menu:
- Recommended software to remove adware automatically.
- Resetting browser settings after automatic removal of adware.
- Video explaining how to reset your browsers affected by adware.
- Tutorial to remove adware manually.
- How to prevent your PC from being reinfected.
First of all, let us devote some time to the issue of how adware and other PUPs (potentially unwanted programs) are spread in the Internet today. There are many cost-free applications which are by default integrated with all sorts of other additional programs users don’t really need. However, sometimes they fail to pay attention to all important software installation details, and this is how they permit software like Internet Quick Access (iQa Browser) to penetrate into their PCs. As a consequence of their failure, they also see these many intrusive Ads powered by Quick Internet Access everywhere.
You obviously need to be extremely careful whenever you surf the Internet and especially when you decide to install some cost-free software into your computer. Always carefully pay attention to the information contained in the EULAs (End User License Agreements) related to these free programs. If you see some unwanted third-party extras, make sure you always select the option of advanced or custom installation, but surely not the standard one. If you followed this pattern of behavior while installing free programs you would be able to avoid the intrusion of this adware and useless browser into your computer.
The best way to fix the problem of Quick Internet Access Ads is to remove Internet Quick Access browser and other malware automatically using a reliable antispyware program. We recommend you to do it with the help of Plumbytes Anti-Malware, which is able to protect your system and to get rid of all malicious applications from your system in an effective manner. Don’t forget to reset all your browser with its help after you get rid of all the infections detected by it. It is very important!
Software to get rid of Quick Internet Access Ads automatically.

Important milestones to delete Quick Internet Access Ads automatically are as follows:
- Downloading and installing the program.
- Scanning of your PC with it.
- Removal of all infections detected by it (with full registered version).
- Resetting your browser with Plumbytes Anti-Malware.
- Restarting your computer.
Detailed instructions to remove Quick Internet Access Ads automatically.
- Download Plumbytes Anti-Malware through the download button above.
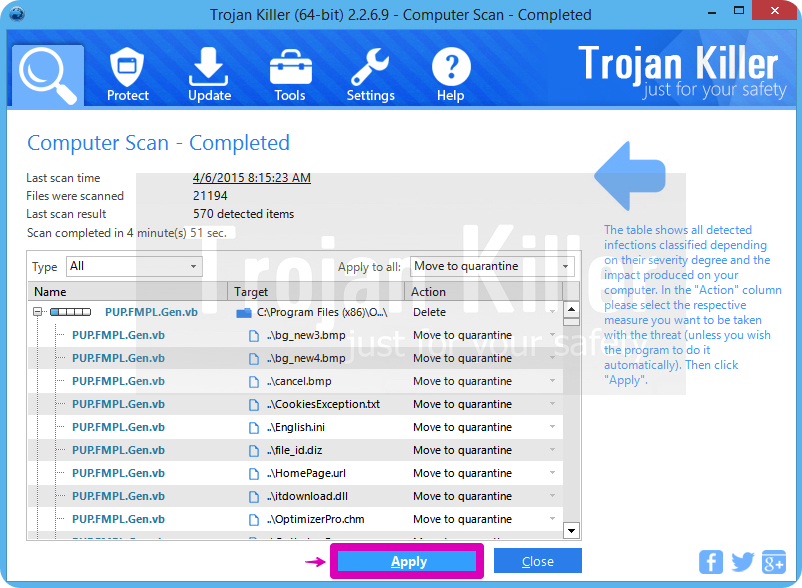
- Install the program and scan your computer with it.
- At the end of scan click “Apply” to remove all infections associated with Quick Internet Access Ads
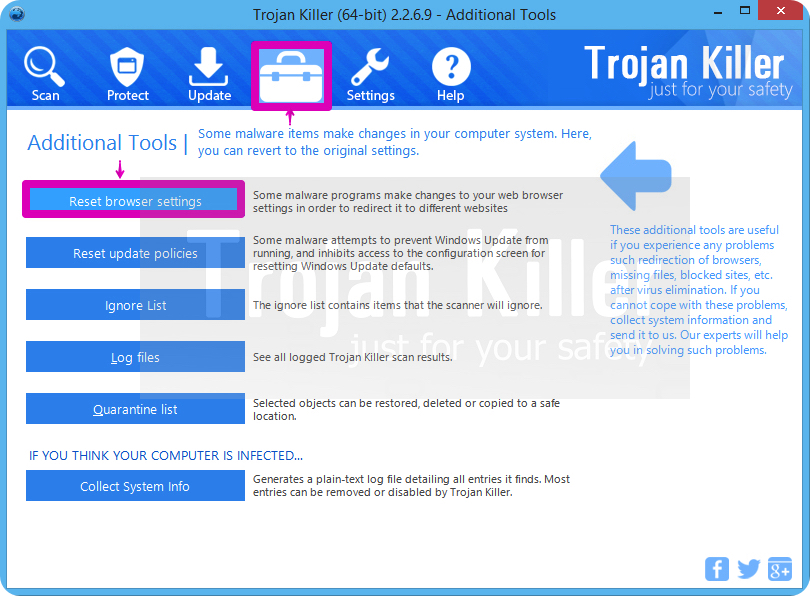
- Important! It is also necessary that you reset your browsers with Plumbytes Anti-Malware after this particular adware removal. Shut down all your available browsers now.
- In Plumbytes Anti-Malware click on “Tools” tab and select “Reset browser settings“:
- Select which particular browsers you want to be reset and choose the reset options.
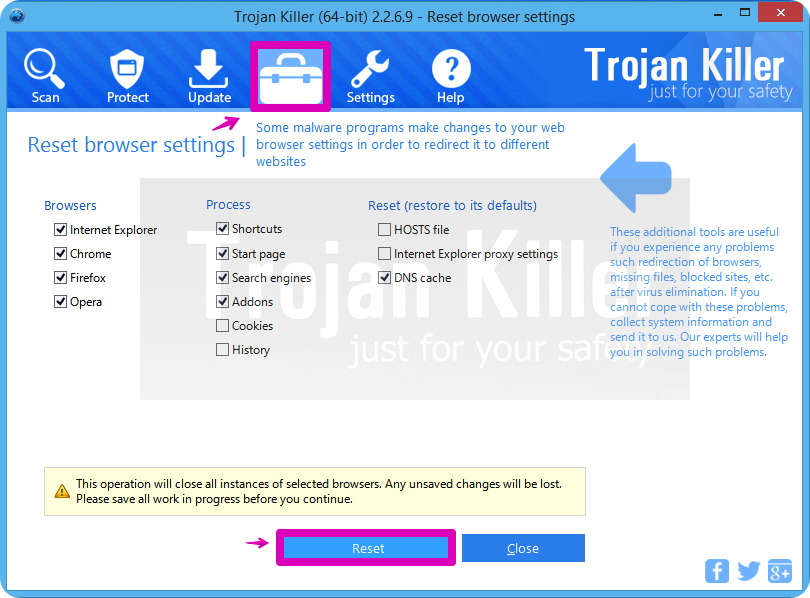
- Click on “Reset” button.
- You will receive the confirmation windows about browser settings reset successfully.
- Reboot your PC now.
Video guide explaining how to reset browsers altogether automatically with Plumbytes Anti-Malware:
Detailed removal instructions to uninstall Internet Quick Access manually
Step 1. Uninstalling this adware from the Control Panel of your computer.
- Make sure that all your browsers infected with Internet Quick Access adware are shut down (closed).
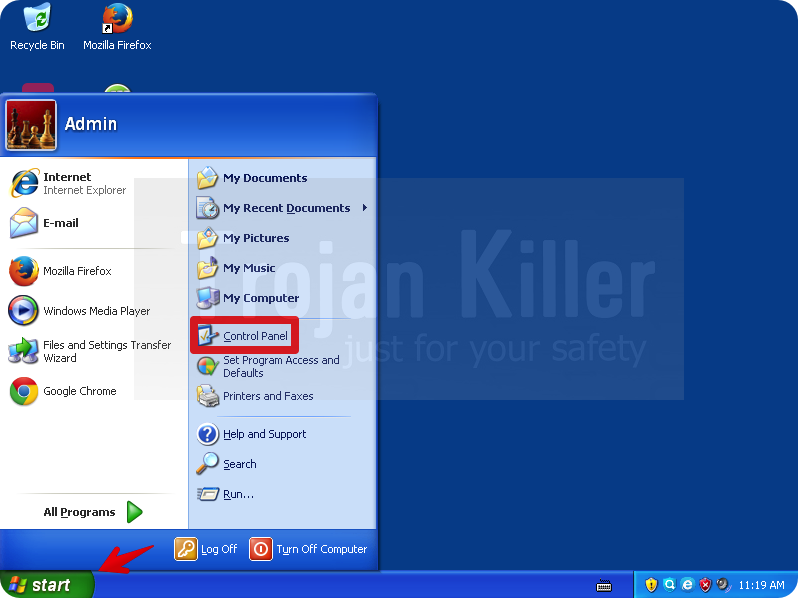
- Click on “Start” and go to the “Control Panel“:
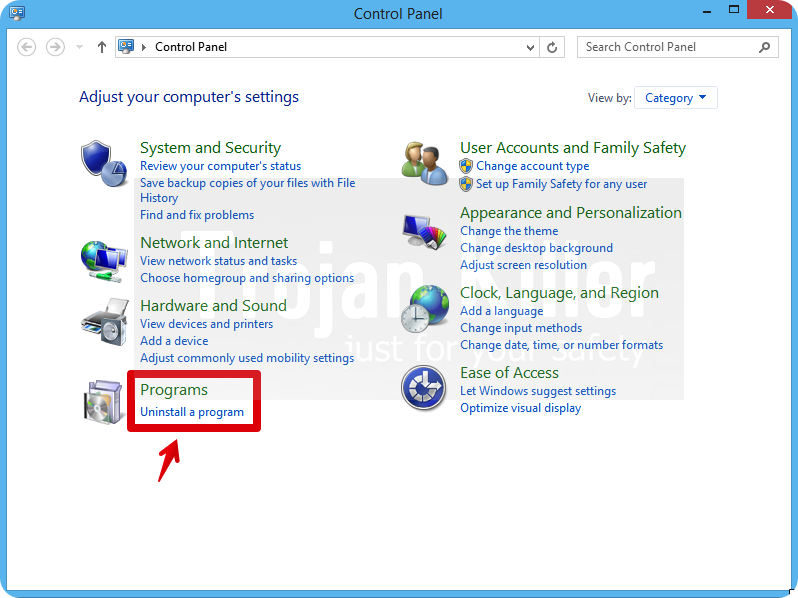
- To access the Control Panel in Windows 8 operating system move the computer mouse towards the left bottom hot corner of Windows 8 screen and right-click on it. In Windows 8.1, simply right-click on the “Start” button. Then click on “Control Panel“:
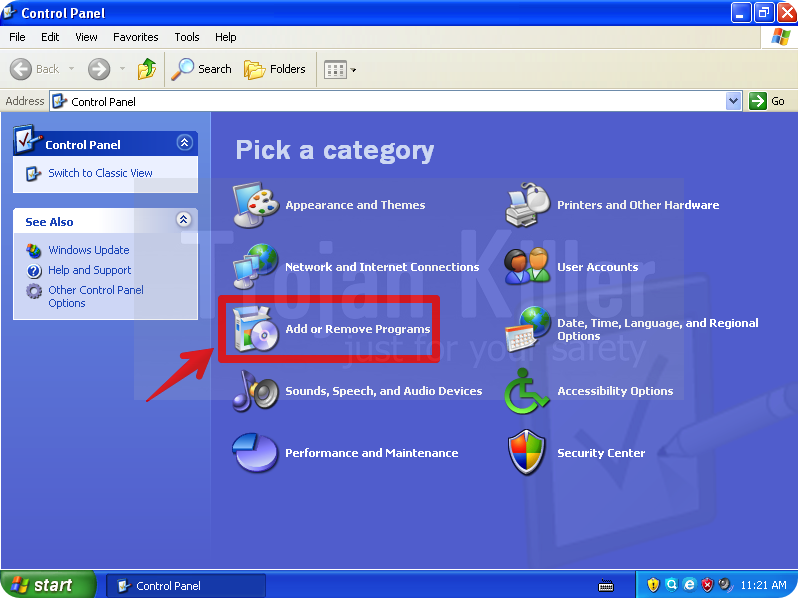
- In Windows XP click on “Add or remove programs“:
- In Windows Vista, 7, 8 and 8.1 click on “Uninstall a program“:
- Uninstall Internet Quick Access adware. To do it, in Windows XP click “Remove” button related to it. In Windows Vista, 7, 8 and 8.1 right-click on this adware with the PC mouse and click on “Uninstall / Change“.

Step 2. Removing adware from the list of add-ons and extensions of your browser.
In addition to removal of adware from the Control Panel of your PC as explained above, you also need to remove this adware from the add-ons or extensions of your browser. Please follow this guide for managing browser add-ons and extensions for more detailed information. Remove any items related to this adware and other unwanted applications installed on your PC.
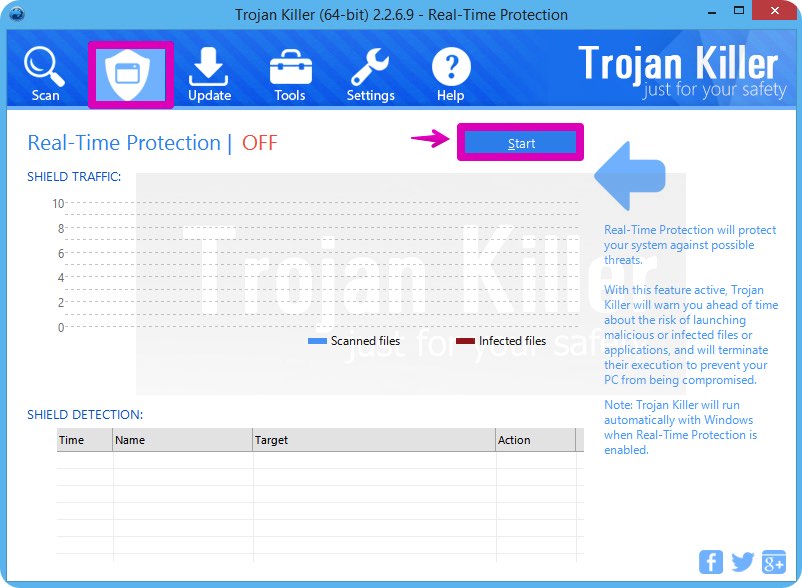
How to prevent your PC from being reinfected:
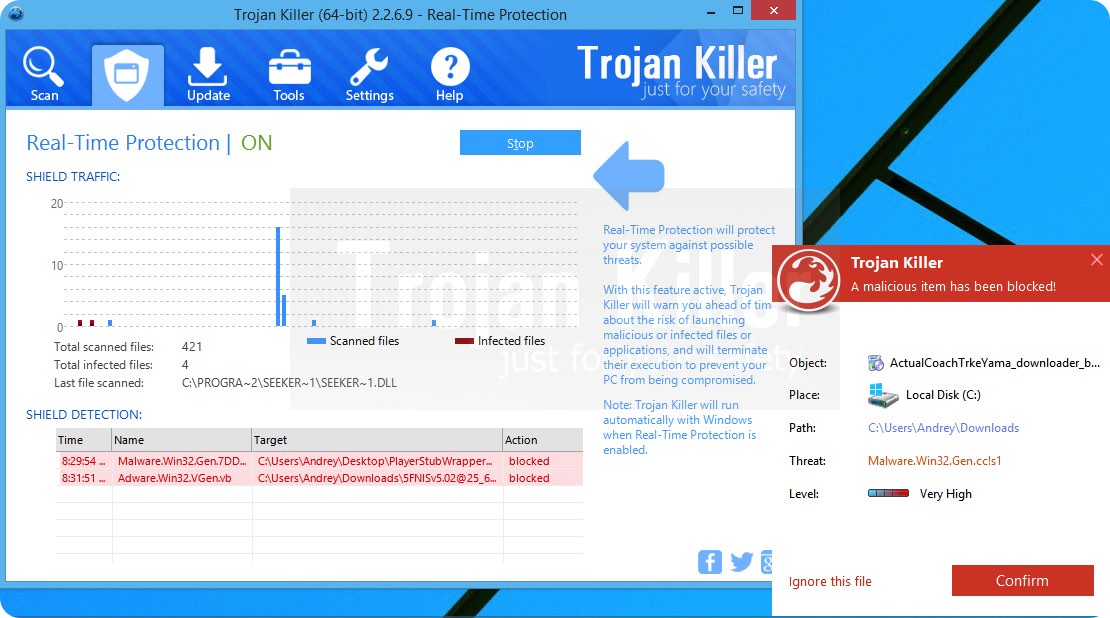
Plumbytes Anti-Malware offers a superb service to prevent malicious programs from being launched in your PC ahead of time. By default, this option is disabled once you install Anti-Malware. To enable the Real-Time Protection mode click on the “Protect” button and hit “Start” as explained below:
Once this option is enabled, your computer will be protected against all possible malware attacking your PC and attempting to execute (install) itself. You may click on the “Confirm” button to continue blocking this infected file from being executed, or you may ignore this warning and launch this file.