Many users in France and some other French-speaking countries today have the problem of Assistant de Notification pop-ups in the right bottom parts of their PC screens. This problem is caused by adware, which somehow became the part of their workstations. Most likely this adware is classified as CrossRider adware family by many security blogs and various antivirus applications. Many of today’s antivirus programs claim to be able to remove this virus effectively, however, these Assistant de Notification pop-ups still come up. Some users tell that they’ve scanned their PCs with all kinds of security applications. Still, this didn’t help them to delete this malware.
Assistant de Notification adware removal menu:
- Recommended software to remove adware automatically.
- Resetting browser settings after automatic removal of adware.
- Video explaining how to reset your browsers affected by adware.
- Tutorial to remove adware manually.
- How to prevent your PC from being reinfected.
Assistant de Notification virus and related adware may penetrate into PCs through other free programs. There are many free applications today which are by default bundled with all sorts of useless extras that people don’t really need. However, users often fail to notice this information. So, they just blindly click on “Next” and “I agree” buttons, without actually understanding what exactly they agree with. As a result, they permit all these unwanted extras to become the part of their browsers by default.
Assistant de notification
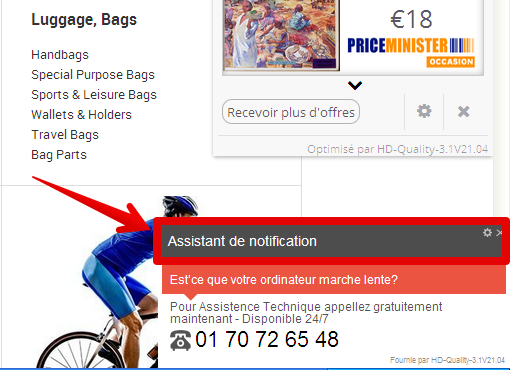
Est’ce que votre ordinateur marche lente?
Pour Assistence Technique appellez gratuitement maintenant – Disponible 24/7
01 70 72 65 48
Fournie par Cinema_Plus-1.2V18.05
Note that these Assistant de Notification pop-ups may appear even if you don’t use your browser right now. However, you will notice that it is powered by some nasty program, which is fairly categorized as adware. Typically, such pop-ups may tell you about various PC problems supposedly identified in your computer. Then you may be suggested to make a phone call to some particular number where you will be told to make payment supposedly to fix your PC. Most likely, by the way, people who will talk to you when you call these numbers will have strong Indian accent. It is obvious that these Assistant de Notification pop-ups simply try to force you into paying money for their totally useless services.
We recommend you not to trust the information stated in such Assistant de Notification pop-ups. Instead, go ahead and scan your system with a reliable antispyware program that will help you to perform the adware removal job very well. For example, you may do it with the help of Plumbytes Anti-Malware, which is powerful enough to detect and remove the most serious computer infections from your PC. You will need to delete all the infections it finds (with its full registered version) and to reset your browsers with its help. In case you need more assistance on our part, please feel free to contact us at any time of your choice. Good luck!
Software to get rid of Assistant de Notification automatically.

Important milestones to delete Assistant de Notification automatically are as follows:
- Downloading and installing the program.
- Scanning of your PC with it.
- Removal of all infections detected by it (with full registered version).
- Resetting your browser with Plumbytes Anti-Malware.
- Restarting your computer.
Detailed instructions to remove Assistant de Notification automatically.
- Download Plumbytes Anti-Malware through the download button above.
- Install the program and scan your computer with it.
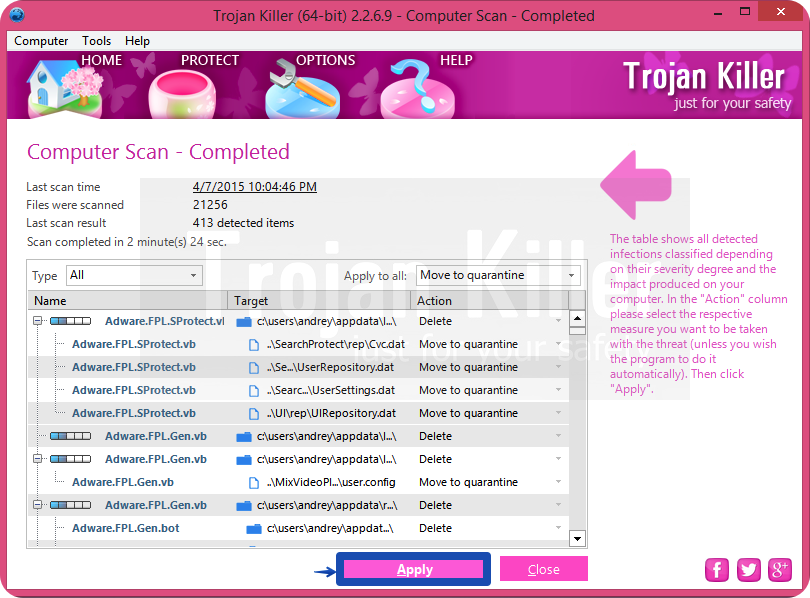
- At the end of scan click “Apply” to remove all infections associated with Assistant de Notification:
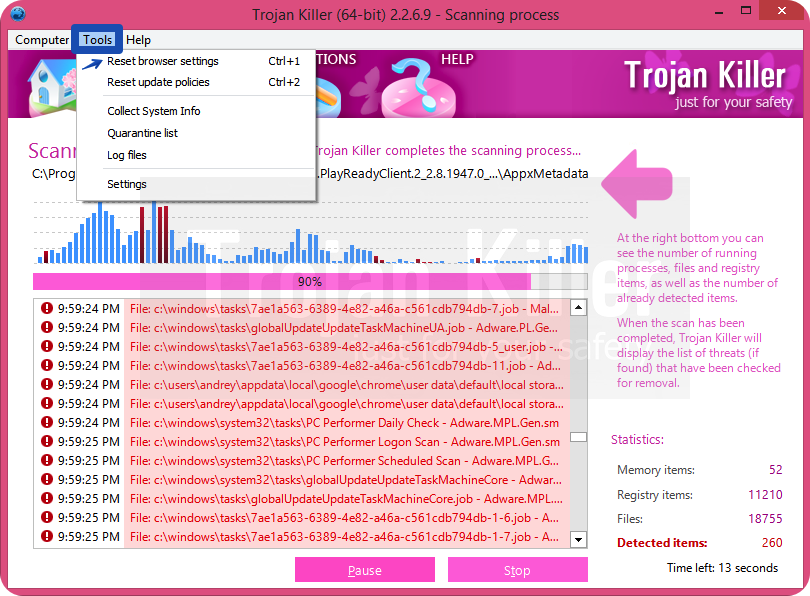
- Important! It is also necessary that you reset your browsers with Plumbytes Anti-Malware after this particular adware removal. Shut down all your available browsers now.
- In Plumbytes Anti-Malware click on “Tools” tab and select “Reset browser settings“:
- Select which particular browsers you want to be reset and choose the reset options.
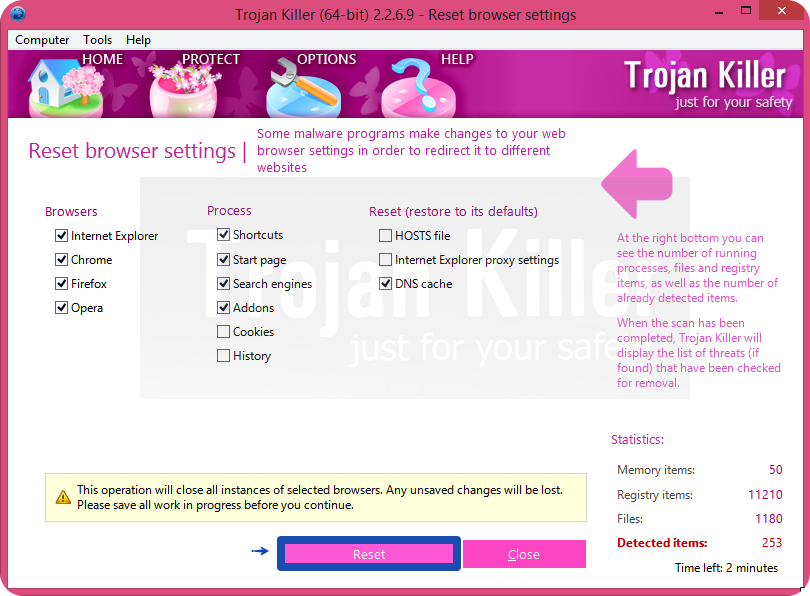
- Click on “Reset” button.
- You will receive the confirmation windows about browser settings reset successfully.
- Reboot your PC now.
Video guide explaining how to reset browsers altogether automatically with Plumbytes Anti-Malware:
Detailed removal instructions to uninstall Assistant de Notification manually
Step 1. Uninstalling this adware from the Control Panel of your computer.
- Make sure that all your browsers infected with Assistant de Notification adware are shut down (closed).
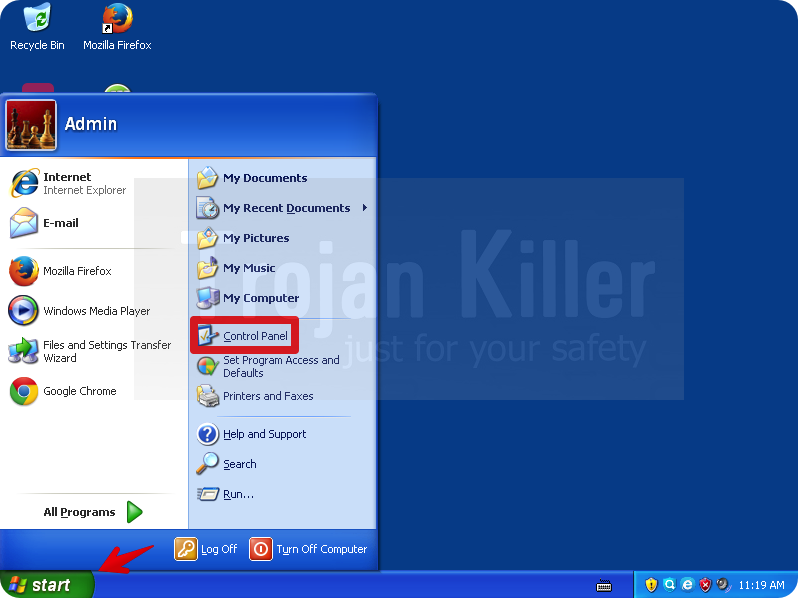
- Click on “Start” and go to the “Control Panel“:
- To access the Control Panel in Windows 8 operating system move the computer mouse towards the left bottom hot corner of Windows 8 screen and right-click on it. In Windows 8.1, simply right-click on the “Start” button. Then click on “Control Panel“:
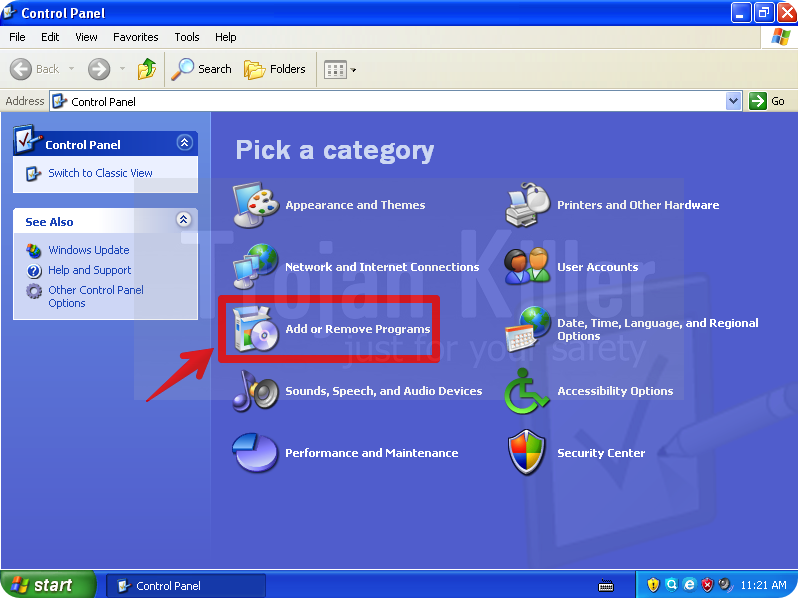
- In Windows XP click on “Add or remove programs“:
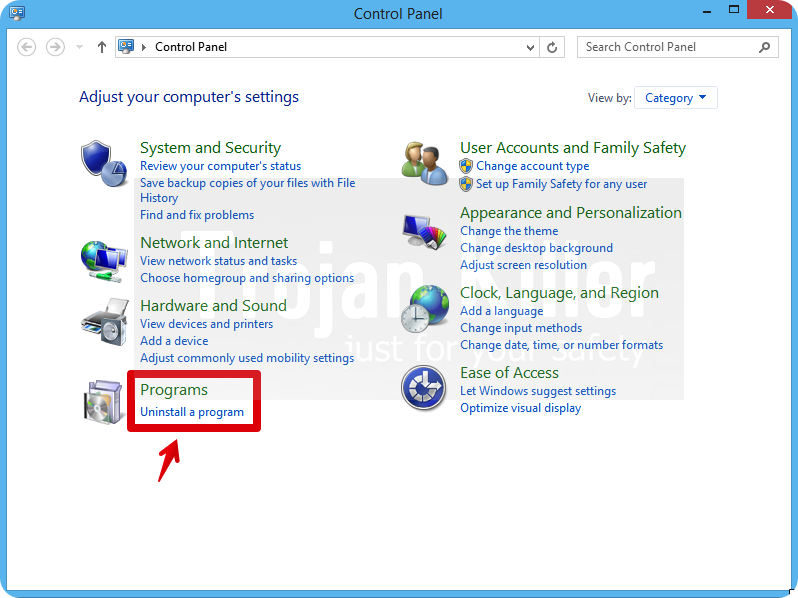
- In Windows Vista, 7, 8 and 8.1 click on “Uninstall a program“:
- Uninstall Assistant de Notification adware. To do it, in Windows XP click “Remove” button related to it. In Windows Vista, 7, 8 and 8.1 right-click on this adware with the PC mouse and click on “Uninstall / Change“.

Step 2. Removing adware from the list of add-ons and extensions of your browser.
In addition to removal of adware from the Control Panel of your PC as explained above, you also need to remove this adware from the add-ons or extensions of your browser. Please follow this guide for managing browser add-ons and extensions for more detailed information. Remove any items related to this adware and other unwanted applications installed on your PC.
How to prevent your PC from being reinfected:
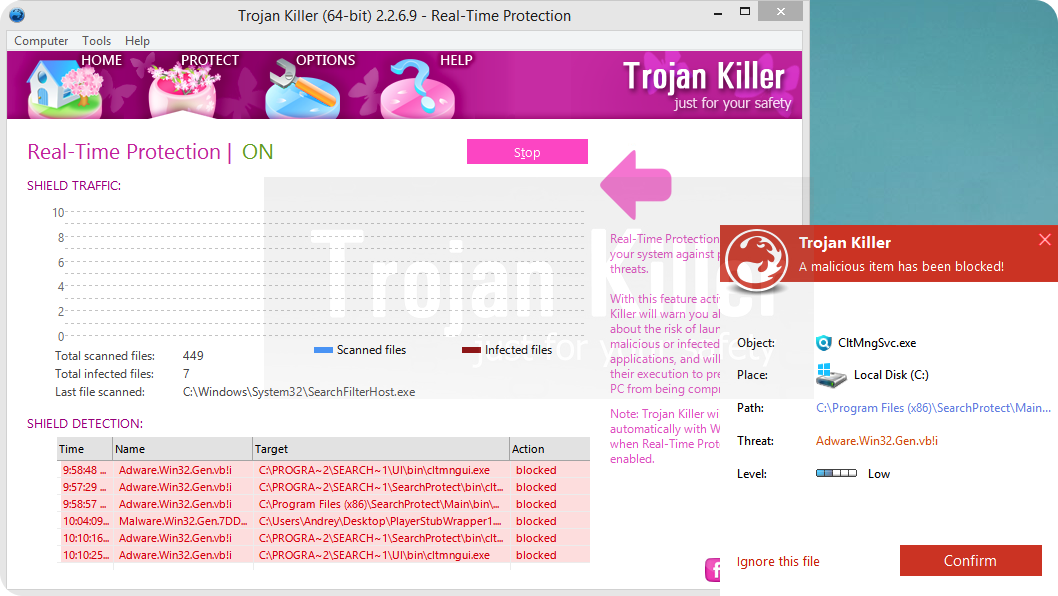
Plumbytes Anti-Malware offers a superb service to prevent malicious programs from being launched in your PC ahead of time. By default, this option is disabled once you install Anti-Malware. To enable the Real-Time Protection mode click on the “Protect” button and hit “Start” as explained below:
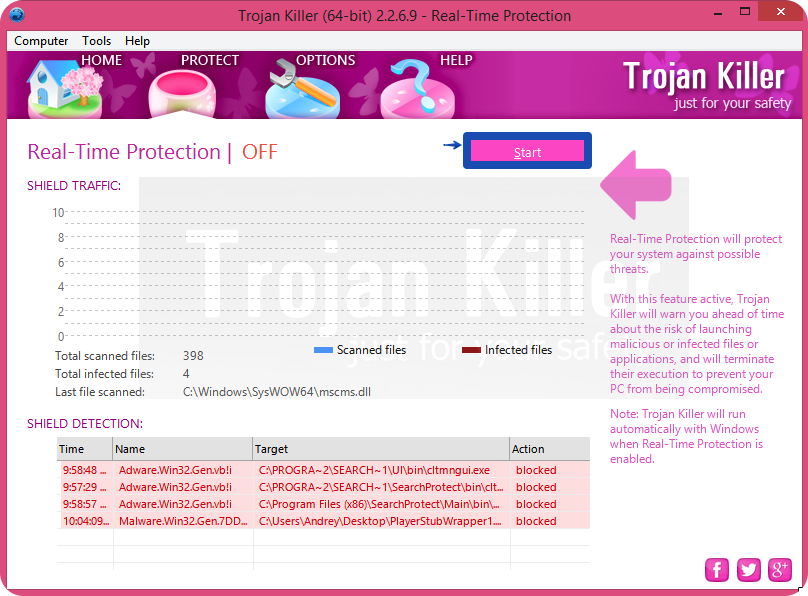
Once this option is enabled, your computer will be protected against all possible malware attacking your PC and attempting to execute (install) itself. You may click on the “Confirm” button to continue blocking this infected file from being executed, or you may ignore this warning and launch this file.